Writing a 3D geometry engine from scratch

Basic and Machine Language

Moderator: Moderators

Post Reply
User avatar
Mike
Herr VC
Posts: 5130
Joined: Wed Dec 01, 2004 1:57 pm
Location: Munich, Germany
Occupation: electrical engineer

Writing a 3D geometry engine from scratch

Post by Mike »

Hi,

this is the first post of a two-thread installation to document and discuss the development of a small-scale 3D geometry engine.

The thread here will contain the documentation how the geometry engine is specified, it will feature some necessary and indispensible info about the involved math, go from basics in 2D to full 3D with translation, rotation and projection - making full use of examples written in MINIGRAFIK enhanced BASIC -, do a step-wise translation to 65xx machine code and finally discuss what is necessary to advance beyond the scope of the featured demo.

Speaking of which, this is what we will conclude this documentation thread with:

Image

This is a rewritten version of my original Vector demo, using a double buffered 96x160 bitmap with pageflipping and 2:6 fixpoint arithmetics. On both PAL and NTSC VIC-20s, it runs with a sustained refresh rate of 10 frames per second.

Here is the demo for download: CubeIco24.zip. Decompress the archive to a directory on SD, if needed, transfer the three files "BOOT", "CODE" and "DATA" to a disk as PRG files, and then run the file "BOOT" with at least a +8K RAM expansion. The demo autodetects PAL/NTSC and will adjust to the different pixel aspect ratio.

An accompanying discussion thread is installed here: link. Please use the linked-to thread for any comments!

When this documentation thread is concluded, I will release the complete source code of the demo.

Greetings,

Michael
User avatar
Mike
Herr VC
Posts: 5130
Joined: Wed Dec 01, 2004 1:57 pm
Location: Munich, Germany
Occupation: electrical engineer

Re: Writing a 3D geometry engine from scratch

Post by Mike »

So, what are we actually looking at?

In a simplified version, this scenario here:

Image

To the right, a cube with a side length of 2, centered around (X,Y,Z)=(4,0,0). The world's x-coordinate coincides with the "optical axis" from left to right. The z-coordinate points roughly upwards, the y-coordinate points "into" the screen, and the three axes form a right-handed co-ordinate system.

You, the observer, are placed at the left-most big dot, at (X,Y,Z)=(0,0,0). There is a projection plane at X=1, represented by the bigger quadrilateral left to the middle. A projection ray goes from the origin/observer to one of the cube vertices, highlighted by another big dot. The intersection point of projection ray and projection plane is shown by the middle big dot.

The positions of cube and projection plane in the world co-ordinate system have been carefully chosen to result in a visible, yet not too much exaggerated perspective 'distortion' - it is about equivalent to how a Rubik's Cube is seen at a near reading distance.


To visualize this scenario, I wrote a program which itself implements yet another 3D geometry engine, in BASIC. MINIGRAFIK is used for the graphics part. Download and decompress the archive into a directory on SD card, transfer it to disk if necessary, and then run the file BOOT with at least a +8K RAM expansion. You will then be prompted for a few values; if you confirm the default numbers by just pressing the RETURN key, you will reproduce the screenshot above:

Code: Select all

AZIMUTHAL ANGLE? -20
POLAR ANGLE? -30
DISTANCE? 10
The program then applies the transformations from world co-ordinates to screen co-ordinates in just a few seconds and then renders the view. Change the angles to obtain a different view. If some of the lines are not rendered in that other view due to clipping, try increasing the distance a bit.


Here's the BASIC listing for reference:

Code: Select all

100 AR=(PEEK(60901)+92)/78:REM ** =5/3 FOR PAL, =3/2 FOR NTSC
101 :
102 XS=160:YS=192
103 XB=.8:YB=XB/(AR*XS/YS)
104 :
105 N=15:DIM X(N),Y(N),Z(N),U(N),V(N)
106 :
107 INPUT "AZIMUTHAL ANGLE{2 SPACE}-20{5 LEFT}";PH:PH=-{PI}/180*PH
108 INPUT "POLAR ANGLE{2 SPACE}-30{5 LEFT}";TH:TH=-{PI}/180*TH
109 INPUT "DISTANCE{2 SPACE}10{4 LEFT}";Y0
110 :
111 REM ** READ IN VERTICES (NOTE DATA ?'S FOR #15!)
112 FOR T=0 TO N
113 READ X$,Y$,Z$
114 X(T)=VAL(X$)
115 Y(T)=VAL(Y$)
116 Z(T)=VAL(Z$)
117 NEXT
118 :
119 REM ** PROJECT VERTEX 15 FROM CUBE VERTEX 1 TO PLANE X=1
120 X(15)=1.0:Y(15)=Y(1)/X(1):Z(15)=Z(1)/X(1)
121 :
122 REM ** APPLY TRANSFORMS
123 C1=COS(PH):S1=SIN(PH)
124 C2=COS(TH):S2=SIN(TH)
125 FOR T=0 TO N
126 X1=X(T)-2.0
127 Y1=Y(T)
128 Z1=Z(T)
129 X2=C1*X1-S1*Y1
130 Y2=S1*X1+C1*Y1
131 Z2=Z1
132 X3=X2
133 Y3=C2*Y2-S2*Z2
134 Z3=S2*Y2+C2*Z2
135 X4=X3
136 Y4=Y3+Y0
137 Z4=Z3
138 U(T)=INT(XS/2+(XS/XB)*(X4/Y4)+0.5)
139 V(T)=INT(YS/2-(YS/YB)*(Z4/Y4)+0.5)
140 NEXT
141 :
142 @ON:@CLR
143 :
144 REM ** DRAW EDGES
145 FOR T=1 TO 18
146 READ I,J
147 U1=U(I):P1=U1>=0ANDU1<XS
148 V1=V(I):P2=V1>=0ANDV1<YS
149 U2=U(J):P3=U2>=0ANDU2<XS
150 V2=V(J):P4=V2>=0ANDV2<YS
151 IFP1ANDP2ANDP3ANDP4THEN:@1,U1,V1TOU2,V2
152 NEXT
153 :
154 REM ** HIGHLIGHT OBSERVER, CUBE VERTEX, PROJECTED VERTEX
155 I= 8:IFU(I)>=1ANDU(I)<XS-1ANDV(I)>=2ANDV(I)<YS-2THENGOSUB164
156 I= 1:IFU(I)>=1ANDU(I)<XS-1ANDV(I)>=2ANDV(I)<YS-2THENGOSUB164
157 I=15:IFU(I)>=1ANDU(I)<XS-1ANDV(I)>=2ANDV(I)<YS-2THENGOSUB164
158 :
159 GETA$:IFA$=""THEN159
160 @RETURN
161 END
162 :
163 REM ** DRAW "BIG POINT"
164 @1,U(I)-1,V(I)-1TOU(I)-1,V(I)+1
165 @1,U(I),V(I)-2TOU(I),V(I)+2
166 @1,U(I)+1,V(I)-1TOU(I)+1,V(I)+1
167 RETURN
168 :
169 REM ** OBJECT, CUBE
170 DATA{2 SPACE}3.0,-1.0, 1.0
171 DATA{2 SPACE}3.0, 1.0, 1.0
172 DATA{2 SPACE}3.0, 1.0,-1.0
173 DATA{2 SPACE}3.0,-1.0,-1.0
174 DATA{2 SPACE}5.0,-1.0, 1.0
175 DATA{2 SPACE}5.0, 1.0, 1.0
176 DATA{2 SPACE}5.0, 1.0,-1.0
177 DATA{2 SPACE}5.0,-1.0,-1.0
178 :
179 REM ** ORIGIN, OBSERVER
180 DATA{2 SPACE}0.0, 0.0, 0.0
181 :
182 REM ** OPTICAL AXIS
183 DATA -1.0, 0.0, 0.0
184 DATA{2 SPACE}6.0, 0.0, 0.0
185 :
186 REM ** PROJECTION PLANE (X=1)
187 DATA{2 SPACE}1.0,-2.0, 1.5
188 DATA{2 SPACE}1.0, 2.0, 1.5
189 DATA{2 SPACE}1.0, 2.0,-1.5
190 DATA{2 SPACE}1.0,-2.0,-1.5
191 :
192 REM ** PROJECTED POINT (SEE LINE 120!)
193 DATA{3 SPACE}? ,{2 SPACE}? ,{2 SPACE}?
194 :
195 REM ** EDGE LIST
196 DATA 9,10
197 DATA 11,12, 12,13, 13,14, 14,11
198 DATA 0,1, 1,2, 2,3, 3,0, 4,5, 5,6, 6,7, 7,4, 0,4, 1,5, 2,6, 3,7
199 DATA 8,1
200 :
201 REM ** MG WORLD WRITTEN 2024-12-08 BY MICHAEL KIRCHER
For this "external" view of the projection process, the "outer" observer (which is you!) is actually placed on the negative y-axis, and is looking at the point (X,Y,Z)=(2,0,0) - see lines 126..128 in the BASIC program.

The azimuthal angle rotates the observer in the x,y-plane - i.e. on the ground, around the scene -, the default negative angle turns the observer clockwise to the left. The geometry engine in turn rotates the whole scene with the inverse angle (see lines 129..131).

The polar angle "elevates" the observer from the x,y-place in direction to the z-axis, rotating him along the new x-axis. Seen "into" the x-axis, a negative angle results in an upwards direction. The geometry engine in turn rotates the whole scene with the inverse angle to present the view with the observer looking downwards (see lines 132..134)

Then, the distance is applied and finally places the observer at the negative y-axis, defaulting at (X,Y,Z)=(0,-10,0). Once again, the geometry engine instead moves the whole scene by the same amount into positive y-axis direction (see lines 135..137).

Finally, lines 138 and 139 project the world co-ordinates on the Y=1 plane and apply the proper scaling for the (U,V) screen co-ordinates (which already include the often enough mentioned pixel aspect ratio!). XS and YS are the screen size in pixels, XB and YB denote the extent of the "screen window" in the Y=1 projection plane - where YB gets the necessary special treatment in line 103 to account for the PAR. XS/2 and YS/2 address the center of the screen window, and the V screen co-ordinate is calculated by subtracting the scaled projected value to account for the left-handed screen co-ordinates!

The rest of the program is boilerplate. Lines 142..157 render the graphics, lines 169..193 contain the vertex set, lines 195..199 contain the edge list, and the example projected point for one of the cube vertices is actually calculated in line 120.


CubeIco24 now places an icosahedron inside that cube, rotates cube and icosahedron around (X,Y,Z)=(4,0,0) around all three axes, transforms it to screen co-ordinates (with X=1 as projection plane) and it does so 10 times per second.

Rendering above scene in nearly pure BASIC (assisted by MINIGRAFIK) only takes a few seconds, but it is still a long way to go to 10 fps. :wink:
User avatar
Mike
Herr VC
Posts: 5130
Joined: Wed Dec 01, 2004 1:57 pm
Location: Munich, Germany
Occupation: electrical engineer

Re: Writing a 3D geometry engine from scratch

Post by Mike »

In this post and the next one, we will step back a bit from the 3D world, and do things in the 2D plane.

The formulas in the preceding program which rotate the vertices around an axis,

Code: Select all

129 X2=C1*X1-S1*Y1
130 Y2=S1*X1+C1*Y1
and

Code: Select all

133 Y3=C2*Y2-S2*Z2
134 Z3=S2*Y2+C2*Z2
are anything but self-explanatory. In your average math text book, you will find them expressed as:

x' := cos(α) · x - sin(α) · y
y' := sin(α) · x + cos(α) · y

which take a point P at co-ordinates (x,y) and turn it in the 2D plane around the origin with an angle α to the point P' at (x',y').

A rigid mathematical proof of these rotation formulas requires the use of the angle sum identities for sine and cosine and conversion between Cartesian and Polar co-ordinates - which is quite likely over the top here for the moment (I will gladly deliver that proof if anyone wants to see it).

A picture says more than a thousand words, ...

Image

... so here is a simple demonstrator (download, unpack the archive and run the file BOOT with at least +8K RAM), which lets us rotate a "VIC-20" caption with an arbitrary angle around the origin, the latter being signified by the intersection of the two co-ordinate axes. At start, you will be prompted for the rotation angle. If you confirm the default angle by just pressing the RETURN key, you will reproduce the screenshot above:

Code: Select all

ANGLE? 30
In a right-handed co-ordinate system, positive values for the angle correspond to a rotation counter-clockwise around the origin.

Here's the BASIC listing for reference:

Code: Select all

10 AR=(PEEK(60901)+92)/78:REM ** =5/3 FOR PAL, =3/2 FOR NTSC
11 :
12 SY=95/23:SX=SY/AR:REM ** DETERMINE SCALE FACTORS
13 :
14 INPUT "ANGLE{2 SPACE}30{4 LEFT}";PH
15 S=SIN({PI}*PH/180):C=COS({PI}*PH/180)
16 :
17 @ON:@CLR
18 :
19 @1,80,0TO80,191:@1,0,96TO159,96
20 :
21 GOSUB 27
22 GET A$:IF A$="" THEN 22
23 @RETURN
24 END
25 :
26 REM ** PROCESS LINE TRAVERSE(S)
27 READ X,Y:GOSUB 37
28 READ X
29 IF X=-1 THEN 27
30 IF X=-2 THEN RETURN
31 READ Y
32 U1=U2:V1=V2:GOSUB 37
33 @1,U1,V1TOU2,V2
34 GOTO 28
35 :
36 REM ** ROTATE POINT AND SCALE TO SCREEN CO-ORDINATES
37 XP=C*X-S*Y
38 YP=S*X+C*Y
39 U2=INT(80.5+SX*XP)
40 V2=INT(96.5-SY*YP)
41 RETURN
42 :
43 DATA 1,6,2.5,1,4,6,-1, 6,6,6,1,-1, 5,6,7,6,-1, 5,1,7,1,-1, 11,5,10,6,9,6,8,5,8,2,9,1
44 DATA 10,1,11,2,-1, 12,3.5,14,3.5,-1, 15,5,16,6,17,6,18,5,18,4,15,1,18,1,-1, 19,5,20
45 DATA 6,21,6,22,5,22,2,21,1,20,1,19,2,19,5,-2
46 :
47 REM ** VECTOR TEXT ROTATE WRITTEN 2024-12-10 BY MICHAEL KIRCHER
You find the rotation formulas in lines 37 and 38 (incidentally, XP and YP stand in for X prime and Y prime, i.e. x' and y') - everything else in the program just serves as test rig for these two formulas.

Even though the caption is printed from a 'perfect' vector definition (see lines 43..45), the letters and numbers look somewhat crooked at various angles. The limited graphics resolution of 160x192 pixels pays its tribute here. It already foreshadows the issues we will run into later when moving from floating point numbers to 2:6 fixpoint numbers: the latter are only about as accurate as the pixel resolution itself, which leads to noticable round-off errors ...
User avatar
Mike
Herr VC
Posts: 5130
Joined: Wed Dec 01, 2004 1:57 pm
Location: Munich, Germany
Occupation: electrical engineer

Re: Writing a 3D geometry engine from scratch

Post by Mike »

In the 3D world, we center that cube to be rotated at (X,Y,Z)=(4,0,0). After rotating, its new vertices are projected onto the X=1 plane, with Y' = Y/X and Z' = Z/X. The display on screen requires us to scale up these values, and we need a good idea how a sensible scale factor is derived.

The vertices of the cube have the distance sqrt(3) = 1.73... from the cube center (this follows directly from the Pythagorean theorem a²+b²=c² applied twice!). When rotating, the cube vertices thus trace out a sphere around (4,0,0) with the radius sqrt(3).

The projection to Y' and Z' can be handled independently, and if we look from the side onto the X,Z plane, we see this scenario:

Image

The sphere and the X,Z plane intersect in the circle to the right with radius sqrt(3). The projected distance Z' on the X=1 plane has the biggest value not for a cube vertex that is perpendicular to the optical axis, but rather for a projection ray from the origin that is a tangent on the circle/sphere!

We have two triangles formed by the origin and either the left pair or the right pair of big dots that share the same angle φ at the origin. Both triangles are right-angled. That means these two triangles are similar: corresponding sides share the same ratio of lengths.

We already know two side lengths of the bigger triangle: 4 units on the optical axis (hypotenuse) and sqrt(3) units of the circle/sphere radius (opposite). The missing side length R of the adjacent is calculated with the Pythagorean theorem, i.e. R² + sqrt(3)² = 4², which results in R := sqrt(4² - sqrt(3)²) = sqrt(13).

The projected length K on the X=1 plane is the opposite of the smaller triangle, and its adjacent has the length 1. Equaling side length ratios, we arrive at:

(tan φ =) K/1 = opposite/adjacent = sqrt(3)/sqrt(13) => K = sqrt(3)/sqrt(13) ~= 0.48

This value - just a bit below 0.5 - is a quite fortunate outcome. When we scale up the projected co-ordinates by a factor up to the vertical or horizontal screen size in pixels and add offsets to center the cube, the resulting screen co-ordinates are guaranteed to stay within the pixel extent of the whole view. With an assumed square pixel aspect ratio, both scale factors have to be chosen equal, and will be limited by the smaller of the two screen extents - most likely, the vertical screen extent -, leaving parts of the screen to left and right empty.

CubeIco24 uses 96 as scale factor for the horizontal axis, and 160 for the vertical axis (with PAL - NTSC uses 144). For PAL, this is exactly the size of the custom screen window and NTSC just leaves the top and bottom 8 pixel rows unused. Using different scale factors for the horizontal and vertical axis is what compensates the non-square pixel aspect ratio here.

The construction sketch in the picture above was done in BASIC (download, as before, un-zip the archive and run BOOT with at least +8K RAM), here's the BASIC listing for reference:

Code: Select all

10 AR=(PEEK(60901)+92)/78:REM ** =5/3 FOR PAL, =3/2 FOR NTSC
11 :
12 SX=36
13 SY=SX*AR
14 OX=80.5-2*SX
15 OY=96.5+0.5*SQR(3)*SY
16 :
17 @ON:@CLR:@1,OX,0TOOX,191:@1,0,OYTO159,OY
18 :
19 CX=INT(OX+4*SX)
20 CY=INT(OY)
21 A=INT(SX*SQR(3)+0.5)
22 B=INT(SY*SQR(3)+0.5)
23 U=CX:V=CY:GOSUB58
24 GOSUB42
25 :
26 R=SQR(4*4-3)
27 PH=ATN(SQR(3)/R)
28 TX=OX+SX*R*COS(PH)
29 TY=OY-SY*R*SIN(PH)
30 @1,OX,OYTOTX,TY:@1,CX,CYTOTX,TY
31 U=TX:V=TY:GOSUB58
32 :
33 K=SQR(3)/R:REM ** K = 0.48...
34 U=OX+SX*1
35 V=OY:GOSUB58
36 V=OY-SY*K:GOSUB58
37 @1,U,OYTOU,V
38 :
39 GETA$:IFA$=""THEN39
40 @RETURN:END
41 :
42 X=0:Y=B:S=B*B:T=A*A*(2*Y-1):U=2*B*B:V=2*A*A:E=0
43 X1=CX+X:Y1=CY+Y:P1=X1>=0ANDX1<160:P2=Y1>=0ANDY1<192
44 X2=CX-X:Y2=CY-Y:P3=X2>=0ANDX2<160:P4=Y2>=0ANDY2<192
45 IFP1ANDP2THEN:@1,X1,Y1
46 IFP1ANDP4THEN:@1,X1,Y2
47 IFP3ANDP4THEN:@1,X2,Y2
48 IFP3ANDP2THEN:@1,X2,Y1
49 IFX=AANDY=0THENRETURN
50 F=E+S:D=0
51 G=F-T:IFABS(F)>ABS(G)THENF=G:D=1
52 G=E-T:IFABS(F)>ABS(G)THENF=G:D=2
53 E=F
54 IFD<2THENX=X+1:S=S+U
55 IFD>0THENY=Y-1:T=T-V
56 GOTO43
57 :
58 @1,U-1,V-1TOU-1,V+1
59 @1,U,V-2TOU,V+2
60 @1,U+1,V-1TOU+1,V+1
61 RETURN
62 :
63 REM ** PROJECT CONSTRUCTION WRITTEN 2024-12-14 BY MICHAEL KIRCHER
After calculating the screen co-ordinates of the origin, line 17 draws the co-ordinate axes. Lines 19..24 draw the sphere/circle around (X,Y,Z)=(4,0,0) with radius sqrt(3).

Lines 26..31 calculate the upper tangent from origin to circle and draw the tangent. The values of R and PH from the derivation above are used to calculate the tangent endpoint on the circle, going from Polar to Cartesian co-ordinates. Lines 33..37 draw the section on the X=1 projection plane that intersects the tangent. Here, the value of K is directly taken from the derivation in the text.

Finally, lines 42..56 and 58..61 contain the ellipse sub-routine and "big dot" sub-routine, respectively.

All these things prepared, we now can move on to realize a first prototype of the geometry engine that rotates cube and icosahedron. :mrgreen:
User avatar
Mike
Herr VC
Posts: 5130
Joined: Wed Dec 01, 2004 1:57 pm
Location: Munich, Germany
Occupation: electrical engineer

Re: Writing a 3D geometry engine from scratch

Post by Mike »

Without much ado, here's a first prototype of the rotating cube in BASIC - leaving out the inscribed icosahedron for now, for speed reasons:

Image

This is the view as shown through the projection window in the 3D world scenario from the start of this thread, employing the rotation and projection formulas showcased in the follow-up posts. As before, download the archive, unzip it and run the file "BOOT" with at least a +8K RAM expansion.

The prototype does an animation frame about every 2 seconds. Of those 2 seconds, it spends 1 1/2 seconds calculating stuff in lines 22..36, and 1/2 second redrawing the graphics in lines 38..43. Here's the BASIC listing for reference:

Code: Select all

10 AR=(PEEK(60901)+92)/78:REM ** =5/3 FOR PAL, =3/2 FOR NTSC
11 :
12 XS=96:YS=XS*AR
13 :
14 DIM X(7),Y(7),Z(7),U(7),V(7)
15 :
16 FORT=0TO7:READX(T):NEXT:DATA -1,-1,-1,-1, 1, 1, 1, 1
17 FORT=0TO7:READY(T):NEXT:DATA -1, 1, 1,-1,-1, 1, 1,-1
18 FORT=0TO7:READZ(T):NEXT:DATA  1, 1,-1,-1, 1, 1,-1,-1
19 :
20 @ON:@CLR:AX=0:AY=0:AZ=0
21 :
22 PH=AX*{PI}/180:C1=COS(PH):S1=SIN(PH)
23 PH=AY*{PI}/180:C2=COS(PH):S2=SIN(PH)
24 PH=AZ*{PI}/180:C3=COS(PH):S3=SIN(PH)
25 :
26 FORT=0TO7:X1=X(T):Y1=Y(T):Z1=Z(T)
27 X2=X1
28 Y2=C1*Y1-S1*Z1
29 Z2=S1*Y1+C1*Z1
30 X3=C2*X2+S2*Z2
31 Y3=Y2
32 Z3=-S2*X2+C2*Z2
33 X4=C3*X3-S3*Y3
34 Y4=S3*X3+C3*Y3
35 Z4=Z3
36 U(T)=80.5+XS*(-Y4)/(X4+4.0):V(T)=96.5-YS*Z4/(X4+4.0):NEXT
37 :
38 @CLR
39 X1=31:Y1=15:X2=128:Y2=176:GOSUB53
40 @1,U(0),V(0)TOU(1),V(1):@1,U(4),V(4)TOU(5),V(5):@1,U(0),V(0)TOU(4),V(4)
41 @1,U(1),V(1)TOU(2),V(2):@1,U(5),V(5)TOU(6),V(6):@1,U(1),V(1)TOU(5),V(5)
42 @1,U(2),V(2)TOU(3),V(3):@1,U(6),V(6)TOU(7),V(7):@1,U(2),V(2)TOU(6),V(6)
43 @1,U(3),V(3)TOU(0),V(0):@1,U(7),V(7)TOU(4),V(4):@1,U(3),V(3)TOU(7),V(7)
44 :
45 AX=AX+4 :AX=AX-360*INT(AX/360)
46 AY=AY+7 :AY=AY-360*INT(AY/360)
47 AZ=AZ-10:AZ=AZ-360*INT(AZ/360)
48 :
49 GETA$:IFA$=""THEN22
50 @RETURN
51 END
52 :
53 @1,X1,Y1TOX2,Y1:@1,X2,Y2TOX1,Y2:@1,X2,Y1TOX2,Y2:@1,X1,Y2TOX1,Y1:RETURN
54 :
55 REM ** MG CUBE ANIMATOR PROTOTYPE WRITTEN 2024-12-19 BY MICHAEL KIRCHER
It already takes some considerations to arrive at least at the speed of 1/2 fps with BASIC. Mainly, it would be a big blunder to recalculate SIN(...) and COS(...) in the rotation formulas over and over again. That's why the values of SIN(...) and COS(...) are calculated only once for each frame, in lines 22 to 24. The rotation formulas around the x-, y- and z-axes are still written down in full, for clarity, leading to some apparently redundant copying of variables. That one can easily be streamlined though, also using fewer temporaries, and will come in later for the machine code port.

In lines 40..43 of the drawing part, all 12 cube edges are explicity written-out and the indices of the vertices are referenced to as constants in U(...) and V(...) instead of reading them off yet another array - in BASIC, this saves some time during the redraw procedure itself. The sequence of calculating and drawing has been carefully arranged so the cube stays on screen most of the time while the next set of screen vertices is produced. A small sub-routine in line 53 implements a BOX command to draw the rectangle frame that indicates the size of the screen window in the machine code version.

Note how the cube never extends beyond that rectangle frame! As pointed out in the preceding post, the results of the world projection formulas Y/X and Z/X - the relevant parts in line 36 being (-Y4)/(X4+4.0) and Z4/(X4+4.0) - never reach or even exceed the magnitude value of 0.5, which ensures that the values in the U(...) and V(...) arrays stay within the extent of said frame.

In those sub-expressions, (-Y4)/(X4+4.0) shows a negative sign for Y4, because the y-axis, as seen through the projection plane X=1, points to the left. Z4/(X4+4.0) is subtracted from the vertical screen center co-ordinate, because the screen co-ordinates are left-handed and the screen's y-axis points down from the top-left corner. Dividing (-Y4) and Z4 by (X4+4.0) instead of X4 itself merely subsumes the translation of the cube center to (X,Y,Z)=(4,0,0), which was implicit in the 3D world example by using 3 and 5 as x-co-ordinates in the vertex set (see lines 170..177 in the 3D world program).


This is now the actual framework/prototype from which the machine code port is going to proceed. MINIGRAFIK provides us with a bearable speed for the graphics primitives in BASIC, up to the point that now the geometry engine - even with factoring out the trigonometric functions - appears as bottleneck. The full machine code version of just the animated cube actually manages to run at nearly 25 fps - so whatever is involved for the port of BASIC to machine code, it has to bridge a speed gap of factor 50!

Time to unbox fixpoint arithmetic.
User avatar
Mike
Herr VC
Posts: 5130
Joined: Wed Dec 01, 2004 1:57 pm
Location: Munich, Germany
Occupation: electrical engineer

Re: Writing a 3D geometry engine from scratch

Post by Mike »

Mike wrote:Time to unbox fixpoint arithmetic.
... or, putting a suitable sub-title to it: "64 is the new 1".

The geometry engine in the program of the preceding post uses quite a lot of additions, subtractions, multiplications and even two divisions. Within the BASIC interpreter, the numbers are processed with floating point arithmetics, each one of the operations takes hundreds of CPU cycles. In addition to that, the interpreter performs lots of parse and search operations, and all that adds up.

At this point, it is helpful to note that the processed numbers (mostly) span a limited range of values. Specifically, none of the numbers in the rotation formulas exceed 2.0 in magnitude: the values of SIN(...) and COS(...) are limited to the range -1.0 .. +1.0, and the co-ordinate values are bounded by +/- sqrt(3) = +/- 1.73... . We also do not need the precision provided by the CBM float format, with 9 significant digits: there are only about 100 pixels in each axis, so 2 significant digits is all we should need.

For the task at hand, arithmetics using a 2:6 fixpoint format is sufficient.

In 2:6 fixpoint, a number value occupies (just) a single byte. We'll be using 2s-complement, 2 bits left to the radix point and 6 bits to the right. Each number is written as binary fraction thus:

Code: Select all

b7 b6 . b5 b4 b3 b2 b1 b0
... with b% (% = 0..7) being either 0 or 1. Some example values, written in fixpoint notation, hexadecimal (decimal) and in their interpretation as float value - for the number range of -2.0 to +1.984375 - follow below. The byte representing the fixpoint value can be obtained by multiplying the float value with 64 and doing proper rounding:

Code: Select all

10.000000 = $80 (128) ^= -2.0
11.000000 = $C0 (192) ^= -1.0
11.111111 = $FF (255) ^= -0.015625
00.000000 = $00 (0)   ^=  0.0
00.000001 = $01 (1)   ^=  0.015625
00.010101 = $15 (21)  ^=  0.328125 (~= 1/3)
00.100000 = $20 (32)  ^=  0.5
01.000000 = $40 (64)  ^=  1.0
01.101111 = $6F (111) ^=  1.734375 (~= sqrt(3))
01.111111 = $7F (127) ^=  1.984375
As long as this restricted number range is not left, two of these numbers can simply be added or subtracted with the CPU's ADC or SBC instructions.

Some temporary results - notably those in each line of the rotation formulas - use an intermediary 4:12 fixpoint format, with 4 bits left to the radix point, and 12 bits to the right. This gives us a better accuracy during that part of the calculation. The additions or subtractions in the rotation formulas add or subtract two of these 4:12 fixpoint numbers, and only then we convert the sum or difference to 2:6 format by effectively discarding the 2 left-most bits and 6 right-most bits: the 2-byte value is shifted two bits to the left, the new high byte contains the result. When the top-most bit is set in the remaining low byte, the new high byte is incremented by 1 to round.

It is actually the multiplication in the rotation formulas that leads to the aforementioned intermediary 4:12 fixpoint format: multiplying two float numbers written as a=A/64 and b=B/64 results in a · b = (A/64) · (B/64) = (A · B) / 4096. A and B being two 2s-complement byte values are thus multiplied with an integer multiplication routine, and the product A · B then is re-interpreted as 4:12 signed fixpoint number.


For the - unsigned or signed - 8 bit x 8 bit -> 16 bit multiplication on the 6502, a lot of implementations can be found in the literature or in sources in the 'net, I'll specifically make use of an implementation that uses a table of squares and the identity

4ab = (a + b)² - (a - b)²

to perform its work, with a streamlined handling of signed numbers. No fancy graphics this time, but here's the routine together with a test rig that checks all 65536 possible products (download and run TEST.PRG with +8K RAM). Here's the BASIC listing:

Code: Select all

10 POKE55,0:POKE56,60:CLR
11 :
12 FORT=673TO739:READA:POKET,A:NEXT
13 DATA 56,165,3,229,4,176,4,73,255,105,1,168,24,165,3,101,4,170,144,16,189,0,61,249,0
14 DATA 60,133,5,189,0,63,249,0,62,176,15,56,189,0,60,249,0,60,133,5,189,0,62,249,0,62
15 DATA 36,3,16,2,229,4,36,4,16,3,56,229,3,133,6,96
16 :
17 FORX=0TO511
18 SQ=INT(X*X/4)
19 HI=INT(SQ/256)
20 LO=SQ-256*HI
21 POKE15360+X,LO
22 POKE15872+X,HI
23 NEXT
24 :
25 FORA=0TO255:POKE3,A:X=A:IFX>=128THENX=X-256
26 FORB=0TO255:POKE4,B:Y=B:IFY>=128THENY=Y-256
27 SYS673
28 XY=PEEK(5)+256*PEEK(6):IFXY>=32768THENXY=XY-65536
29 PRINTX*Y,XY:IFX*Y<>XYTHENSTOP
30 NEXT
31 NEXT
32 END
33 :
34 REM ** SIGNED 8X8->16 MULTIPLY TEST WRITTEN 2024-12-22 BY MICHAEL KIRCHER
Line 10 reserves/protects memory for the square table (1 KB), lines 12..15 poke the machine code for the multiply routine, lines 17..23 initialize the square table and lines 25..31 perform the full test. For those kind of programs, using Warp mode in VICE with Alt+W comes in quite handy. ;)

Addresses 3 and 4 contain the two factors; addresses 5 and 6 contain low and high byte of the resulting product, respectively. The IFs in lines 25, 26 and 28 provide the signed values in X, Y and XY. Should the multiply routine return a result in XY that is different from BASIC's X*Y, line 29 stops the program with a ?BREAK error message (... we tacitly assume BASIC gets its things right when computing X*Y ...). That error message does not occur, and all those 65536 tests done, the programs ends in line 32, confirming the correctness of the multiply routine:

Image


Here's the machine code source, excluding the assembler's boilerplate (and using $ to denote hex):

Code: Select all

.Multiply
 SEC
 LDA zp_factor_1
 SBC zp_factor_2
 BCS Multiply_00
 EOR #$FF
 ADC #$01
.Multiply_00
 TAY
 CLC
 LDA zp_factor_1
 ADC zp_factor_2
 TAX
 BCC Multiply_01
 LDA abs_table_lo+$0100,X
 SBC abs_table_lo,Y
 STA zp_result_lo
 LDA abs_table_hi+$0100,X
 SBC abs_table_hi,Y
 BCS Multiply_02
.Multiply_01
 SEC
 LDA abs_table_lo,X
 SBC abs_table_lo,Y
 STA zp_result_lo
 LDA abs_table_hi,X
 SBC abs_table_hi,Y
.Multiply_02

 BIT zp_factor_1
 BPL Multiply_03
 SBC zp_factor_2
.Multiply_03
 BIT zp_factor_2
 BPL Multiply_04
 SEC
 SBC zp_factor_1
.Multiply_04

 STA zp_result_hi
 RTS
By leaving out the lines from "BIT zp_factor_1" to ".Multiply_04", we obtain the unsigned multiply.

The routine takes the factors from two ZP addresses and also puts the result into two ZP addresses. Lots of examples found in the 'net expect the input in the CPU registers and also return the result in CPU registers. The core of the multiply routine can be implemented this way, though for most practical purposes, the input values won't already be "there" but will need to be fetched from memory. It is quite as well unlikely, that the result will directly be processed by another multiply and thus the result has to be stored into memory anyway. The input/output processing for those other routines easily adds another 12 cycles (2x LD% ZP, 2x ST% ZP, % ^= any of the CPU registers) to their cycle count! For the routine above, the unsigned part needs 50 or 53 cycles; depending on the signs, the whole routine excluding the RTS needs between 62 and 71 cycles, 66.5 cycles on average.

We're excluding the cycles for RTS as in the geometry engine, we will inline the routine! It would be a big blunder to waste time by calling it as subroutine: that alone already loses 12 cycles due to JSR/RTS, parameter passing from several temporaries to the 4 argument "registers" then easily loses another 24 or 28 cycles depending on whether the temporaries reside, or not reside, in ZP. Instead the inlined instantiations of the multiply routine access the temporaries directly.


The two divisions in the geometry engine will be reformulated to also use the multiply routine, using reciprocals. Finally, the SIN(...) and COS(...) functions also get the necessary treatment to fit into the fixpoint framework.


All that brought forward as statement of intent, it is still necessary to do a proof-of-concept in BASIC. This will ensure us, that the reduced precision actually still is sufficient and that also no overflows in the sub-expressions (especially not in the rotation formulas) spoil the result.
User avatar
Mike
Herr VC
Posts: 5130
Joined: Wed Dec 01, 2004 1:57 pm
Location: Munich, Germany
Occupation: electrical engineer

Re: Writing a 3D geometry engine from scratch

Post by Mike »

We continue the previous post by rolling up things from the end:
Mike wrote:[...] the SIN(...) and COS(...) functions also get the necessary treatment to fit into the fixpoint framework.
This is by far the easiest part and deserves a similar subtitle as in the previous post: "256 units are the new 360 degrees".

For SIN(...) and COS(...), we define 256 units as new full angle. This allows us to hold angles in either the X or Y index register and read off the values from a table, which are stored there in 2:6 fixpoint format. Only one table is necessary for both functions, as cos(φ) := sin(φ + π/2) - by extending the table for SIN(...) by another 64 values (64 units = 90° = π/2) we can read off the values for COS(...) by adding 64 to the base address!

In the two examples included with this post, the array S%() is dimensioned for 320 elements - with DIM S%(319) - and initialised thus:

Code: Select all

FORT=0TO319:S%(T)=INT(64*SIN({PI}*T/128)+0.5):NEXT
The idiom "INT(64*...+0.5)" produces the rounded fixpoint value from float and this idiom appears quite often. It therefore makes sense to use DEF FN here.

The two divisions in the geometry engine will be reformulated to also use the multiply routine, using reciprocals.
This in comparison needs much more careful preparation. We start from the original formula for V(T) in the example program of the Dec 19th post, to cite: "V(T)=96.5-YS·Z4/(X4+4.0)", simplified to V=YS·Z/(X+4.0) - we can ignore the negative sign and the centering addition for now.

Step 1: Z, X and the distance 4.0 are multiplied each with 64 to obtain their fixpoint values. As this merely expands the fraction, the value of V remains unchanged!

(1) V=YS·Z/(X+4.0) <=> V=YS·64·Z/(64·X+64·4.0)

Step 2: We'll come in from the rotation formulas with the equivalent fixpoint values Z% := 64·Z and X% := 64·X. In effect, all that has changed up to now was re-scaling the distance 4.0 for fixpoint:

(2) V=YS·64·Z/(64·X+64·4.0) <=> V = YS·Z%/(X%+256)

This nominally out-of-bounds fixpoint value for 4.0 need not worry us. It only appears during this derivation which aims to do away with the division. As is, the result of the division Z%/(X%+256) would not directly be useful anyway - in the post of Dec 15th we had calculated its value to be less than 0.5 in magnitude - an integer division would round this value down to a useless 0. Doing that division in full, with YS·Z% as numerator and X%+256 as denominator would indeed work, but also would require us to provide both input values in 16 bit (this also takes care of the otherwise out-of-bounds distance value). This is too expensive, instead we use reciprocals.

Step 3: Multiply with an auxiliary 1 and re-order numerator and denominator:

(3) V = YS·Z%/(X%+256) <=> V = (64/64)·YS·Z%/(X%+256) = Z%·64·YS/(X%+256)/64

Step 4: We set Q% := 64·YS/(X%+256) and - similar to SIN(...) and COS(...) - we store all 256 possible values in a table Q%(...). V now simply computes as 8-bit x 8-bit -> 16-bit multiplication: we can re-use the multiplication routine for the rotation formulas, and even do the same reduction from the intermediary 4:12 fixpoint to 2:6 fixpoint, nominally dividing by 64 - and, as promised, the 'problematic' distance value of 256 in fixpoint has gone away:

(4) V = Z% · Q%(X%) / 64

For both rotations and projections, we will properly round the division by 64 - in BASIC, the idiom "INT(.../64 + 0.5)" also appears quite often, and it also make sense to use DEF FN here.

The array Q%(...) for the vertical projection contains fixpoint values corresponding to the range 0.42 (~=160/(127+256)) to 1.25 (=160/(-128+256)) in PAL. Q%(...) for NTSC is slightly different and spans the range 0.38 (~=144/383) to 1.125 (=144/128). A third array - P%(...) for the horizontal projection - has the same values and value range for both PAL and NTSC, going from 0.25 (~=96/383) to 0.75 (=96/128). All these values are perfectly representable as 2:6 fixpoint.

There's a small caveat however: using the reciprocals instead of doing the divisions introduces additional round-off error.


The first example tests the projection using reciprocals by rotating a single point at distance sqrt(3) around the z-axis over the full angle (resulting in 256 plots), tilting the resulting disk outline towards the observer along the x-axis and then doing the projection. All relevant values are stored in integer variables to highlight that all the calculations can also be done in fixpoint:

Image

Load and start the file "RUN DISK" in the archive (download) with at least +8K RAM. By confirming the default Polar angle of -10°, the screenshot above is reproduced. During startup and before prompting the user, the program calculates the tables. This takes quite some time - again using Warp mode in VICE (with Alt+W) helps here.

In the 'front' part of the disk outline, some gaps are visible - there are simply not enough angle values available to fill up those gaps. There are also 'stray' pixels to the inner and outer side of the resulting ellipse perimeter, and these stray pixels come from the aforementioned round-off errors.

Here's the BASIC listing of the first example program for reference:

Code: Select all

10 AR=(PEEK(60901)+92)/78:REM ** =5/3 FOR PAL, =3/2 FOR NTSC
11 :
12 XS=96:YS=XS*AR
13 :
14 DEFFNFX(X)=INT(64*X+0.5)
15 DEFFNCV(X)=INT(X/64+0.5)
16 :
17 DIMS%(319),P%(255),Q%(255)
18 :
19 FORT=0TO319:S%(T)=FNFX(SIN({PI}*T/128)):NEXT
20 FORT=-128TO127:P%(128+T)=FNFX(XS/(T+64*4.0)):NEXT
21 FORT=-128TO127:Q%(128+T)=FNFX(YS/(T+64*4.0)):NEXT
22 :
23 INPUT"POLAR ANGLE{2 SPACE}-10{5 LEFT}";TH:AX%=INT(256*(-TH)/360+0.5)AND255
24 :
25 @ON:@CLR
26 X1%=31:Y1%=15:X2%=128:Y2%=176:GOSUB41
27 R%=FNFX(SQR(3))
28 :
29 FORT=0TO255:AZ%=T
30 X1%=R%:Y1%=0:Z1%=0
31 S%=S%(AZ%):C%=S%(64+AZ%):X2%=FNCV(C%*X1%-S%*Y1%):Y2%=FNCV(S%*X1%+C%*Y1%):Z2%=Z1%
32 S%=S%(AX%):C%=S%(64+AX%):Y1%=FNCV(C%*Y2%-S%*Z2%):Z1%=FNCV(S%*Y2%+C%*Z2%):X1%=X2%
33 U%=80+FNCV(X1%*P%(128+Y1%)):V%=96-FNCV(Z1%*Q%(128+Y1%))
34 @1,U%,V%
35 NEXT
36 :
37 GETA$:IFA$=""THEN37
38 @RETURN
39 END
40 :
41 @1,X1%,Y1%TOX2%,Y1%:@1,X2%,Y2%TOX1%,Y2%
42 @1,X2%,Y1%TOX2%,Y2%:@1,X1%,Y2%TOX1%,Y1%
43 RETURN
44 :
45 REM ** DISK FIXPOINT PROJECTION WRITTEN 2024-12-30 BY MICHAEL KIRCHER
The tables S%(...), P%(...) and Q%(...) are prepared in the lines 19..21. For the implementation in BASIC, both arrays P%(...) and Q%(...) are indexed using excess-128 notation instead of 2s-complement.

Note that the relevant part of the geometry engine, lines 29..35, has all the values stored in integer variables! Nominally, the divisions in the expressions for U% and V% in line 33 have been eliminated by the reciprocals in the arrays P%(...) and Q%(...) - the division by 64 in FNCV(...) doesn't count and will be replaced by shift operations when we do the port to machine code. Also note only one temporary for the S% and C% values is used - their values are directly read off the table S%(...).


For the cube rotator, there's a final preparation we need to do: reduce the number of temporary variables and eliminate redundant assignments. The original goes through the full set of indices 1, 2, 3 and 4 for the intermediary X,Y and Z values (see lines 26..36). That can be streamlined as follows:

Code: Select all

** (lines 27..29): rotate Y1, Z1 to Y2, Z2; X1 stays put. Y1, Z1 free afterwards.

X2=X1:Y2=C1*Y1-S1*Z1:Z2=S1*Y1+C1*Z1  => Y2=C*Y1-S*Z1:Z2=S*Y1+C*Z1

** (lines 30..32): Rotate Z2, X1 to Z1, X2; Y2 stays put. Z2, X1 free afterwards.

X3=C2*X2+S2*Z2:Y3=Y2:Z3=-S2*X2+C2*Z2 => Z1=C*Z2-S*X1:X2=S*Z2+C*X1

** (lines 33..35): Rotate X2, Y2 to X1, Y1. Z1 stays put.

X4=C3*X3-S3*Y3:Y4=S3*X3+C3*Y3:Z4=Z3  => X1=C*X2-S*Y2:Y1=S*X2+C*Y2
Again only one temporary for the S% and C% values is used. All this put together results in the second example below, load and start the file "RUN CUBE" to see the result. Here's the BASIC listing for reference:

Code: Select all

10 AR=(PEEK(60901)+92)/78:REM ** =5/3 FOR PAL, =3/2 FOR NTSC
11 :
12 XS=96:YS=XS*AR
13 :
14 DEFFNFX(X)=INT(64*X+0.5)
15 DEFFNCV(X)=INT(X/64+0.5)
16 :
17 DIMS%(319),P%(255),Q%(255),X%(7),Y%(7),Z%(7),U%(7),V%(7)
18 :
19 FORT=0TO319:S%(T)=FNFX(SIN({PI}*T/128)):NEXT
20 FORT=-128TO127:P%(128+T)=FNFX(XS/(T+64*4.0)):NEXT
21 FORT=-128TO127:Q%(128+T)=FNFX(YS/(T+64*4.0)):NEXT
22 :
23 FORT=0TO7:READX%(T):NEXT:DATA -64,-64,-64,-64, 64, 64, 64, 64
24 FORT=0TO7:READY%(T):NEXT:DATA -64, 64, 64,-64,-64, 64, 64,-64
25 FORT=0TO7:READZ%(T):NEXT:DATA  64, 64,-64,-64, 64, 64,-64,-64
26 :
27 @ON:@CLR:AX%=0:AY%=0:AZ%=0
28 :
29 FORT=0TO7:X1%=X%(T):Y1%=Y%(T):Z1%=Z%(T)
30 S%=S%(AX%):C%=S%(64+AX%):Y2%=FNCV(C%*Y1%-S%*Z1%):Z2%=FNCV(S%*Y1%+C%*Z1%)
31 S%=S%(AY%):C%=S%(64+AY%):Z1%=FNCV(C%*Z2%-S%*X1%):X2%=FNCV(S%*Z2%+C%*X1%)
32 S%=S%(AZ%):C%=S%(64+AZ%):X1%=FNCV(C%*X2%-S%*Y2%):Y1%=FNCV(S%*X2%+C%*Y2%)
33 U%(T)=80+FNCV((-Y1%)*P%(128+X1%)):V%(T)=96-FNCV(Z1%*Q%(128+X1%)):NEXT
34 :
35 @CLR
36 X1%=31:Y1%=15:X2%=128:Y2%=176:GOSUB48
37 @1,U%(0),V%(0)TOU%(1),V%(1):@1,U%(4),V%(4)TOU%(5),V%(5):@1,U%(0),V%(0)TOU%(4),V%(4)
38 @1,U%(1),V%(1)TOU%(2),V%(2):@1,U%(5),V%(5)TOU%(6),V%(6):@1,U%(1),V%(1)TOU%(5),V%(5)
39 @1,U%(2),V%(2)TOU%(3),V%(3):@1,U%(6),V%(6)TOU%(7),V%(7):@1,U%(2),V%(2)TOU%(6),V%(6)
40 @1,U%(3),V%(3)TOU%(0),V%(0):@1,U%(7),V%(7)TOU%(4),V%(4):@1,U%(3),V%(3)TOU%(7),V%(7)
41 :
42 AX%=AX%+3AND255:AY%=AY%+5AND255:AZ%=AZ%-7AND255
43 :
44 GETA$:IFA$=""THEN29
45 @RETURN
46 END
47 :
48 @1,X1%,Y1%TOX2%,Y1%:@1,X2%,Y2%TOX1%,Y2%
49 @1,X2%,Y1%TOX2%,Y2%:@1,X1%,Y2%TOX1%,Y1%
50 RETURN
51 :
52 REM ** MG CUBE ANIMATOR FIXPOINT VERSION WRITTEN 2024-12-25 BY MICHAEL KIRCHER
The co-ordinate values of the cube in the DATA lines 22..24 have already been converted to fixpoint. Note the increments for the angles in line 42 have been adjusted for their rescaled range, and can use "AND255" instead of the more expensive modulo 360. Everywhere where multiplications result in those intermediary 4:12 fixpoint values, these values still fit into signed 16-bit integer and FNCV(...) is used to convert them to 2:6 fixpoint.

Even though now all expensive operations - at least from the view of machine language - have been removed from this second cube rotator prototype, the result gives quite some disappointment. It is much slower than the first prototype expressed in floating point!

This can be fully attributed to how integer arithmetic is implemented in CBM BASIC. The interpreter does not contain extra routines for processing integer values (with the exception of the AND, OR and NOT operators), instead all calculations are still done with floats. Extra conversions between their storage as integer values and their handling in-expression as float values slows everything down here.


Still, we have done our homework. In the next iteration of this workshop, we will just translate lines 29..33 to machine code - and then, suddenly, not anymore the geometry engine will be the bottleneck ...
User avatar
Mike
Herr VC
Posts: 5130
Joined: Wed Dec 01, 2004 1:57 pm
Location: Munich, Germany
Occupation: electrical engineer

Re: Writing a 3D geometry engine from scratch

Post by Mike »

A Happy New Year to all! :D

For this post, the download link goes first - without further ado: 
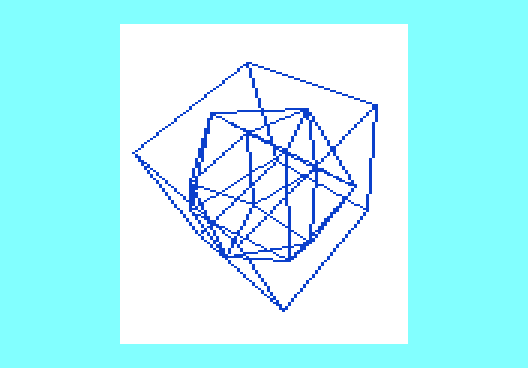
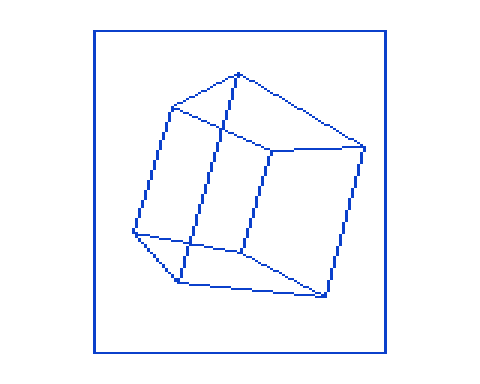
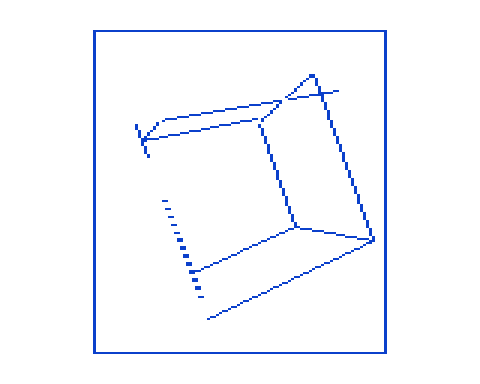
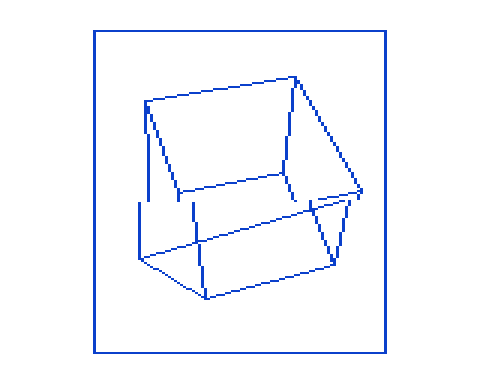
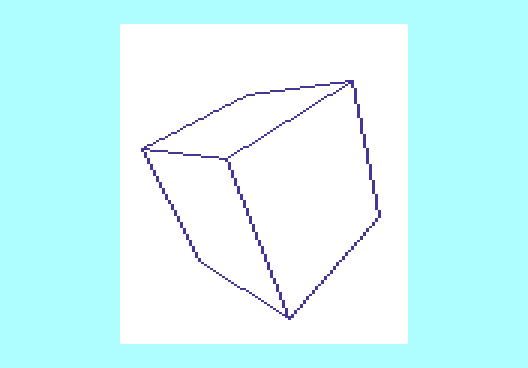
blended.zip. Uncompress the archive and run the file BOOT with at least a +8K RAM expansion. You see the cube rotator using blended code: the geometry engine is now completely written in machine code, the graphics part still uses MINIGRAFIK as test rig for the machine code.

It now runs at 2 fps. :)


Now for the longer part: as already mentioned in the post about the multiply routine, the multiply routine is intended to be inlined into the geometry engine to avoid redundant memory/'register' transfers. Before we go about that, at first we need to identify all relevant temporaries, these are:
  • zp_ax, zp_ay, zp_az: 3 angles for each axis, 1 byte each,
  • zp_vertex: index for running vertex number, values 0..7,
  • zp_x1, zp_y1, zp_z1: the first set of co-ordinate temporaries, 1 byte each, 2:6 fixpoint,
  • zp_x2, zp_y2, zp_z2: the second set of co-ordinate temporaries, 1 byte each, 2:6 fixpoint,
  • zp_sin, zp_P: sine of angle or horizontal reciprocal, 1 byte, 2:6 fixpoint,
  • zp_cos, zp_Q: cosine of angle or vertical reciprocal, 1 byte, 2:6 fixpoint,
  • zp_temp1: first product in rotation sum/difference, or horizontal projection temporary, 2 bytes, 4:12 fixpoint,
  • zp_temp2: second product in rotation sum/difference, or vertical projection temporary, 2 bytes, 4:12 fixpoint,
  • zp_temp: 1 byte temporary value, used during the projection step.
We are going to put all these in Zeropage. For the moment, zp_ax, zp_ay and zp_az are placed in $03..$05, the others go to addresses $58..$65. This is the storage used by the BASIC interpreter to hold float values during calculations - we just decided to let a machine code routine do that job, so the interpreter won't complain. ;) The angle values will join their peers at $55..$57 in a later version that is the full machine code version, but in the moment they are input parameters from BASIC and need to be stored at free addresses.

We will place the arrays for the X, Y, Z input vertex values in protected BASIC RAM, as well as the arrays for the resulting U and V output screen co-ordinates.


It would be quite daring to convert the whole program to machine code in one step! First, the geometry engine has to be right. That means: there are the loop control instructions, 6 sine/cosine table lookups, 12 slightly different multiplies (written out), 6 sum/differences with conversions from 4:12 to 2:6 fixpoint, 2 reciprocal lookups, another 2 customized multiplies and another 2 conversions 4:12 -> 2:6 fixpoint for the projection and finally outputting the screen co-ordinates. Especially the multiplies could become a big bag of bugs, if we'd go and instantiate them by changing all parameter zp addresses manually!

We use a template generator instead, written in C:

Code: Select all

/*
 *  geometry.c - emit a 65xx 3D geometry engine from template/macro definitions
 * 
 *  written 2025-01-02 by Michael Kircher
 * 
 *  - this results in raw source code, the resulting output will need its labels
 *    to be unified as "Geometry_XX", and have boilerplate added for assembler.
 */

#include <stdio.h>
#include <stdlib.h>

void expand0(FILE *stream,
             char *angle)
{
  fprintf(stream," LDX %s\n",angle);
  fprintf(stream," LDA abs_SIN,X   :STA zp_sin\n");
  fprintf(stream," LDA abs_SIN+64,X:STA zp_cos\n");
  fprintf(stream,"\n");
}

void expand1(FILE *stream,
             char *factor_1, char *factor_2,
             char *result_lo, char *result_hi,
             char *label)
{
  fprintf(stream," SEC:LDA %s:SBC %s:BCS %s_00:EOR #255:ADC #1\n",factor_1,factor_2,label);
  fprintf(stream,".%s_00\n",label);
  fprintf(stream," TAY:CLC:LDA %s:ADC %s:TAX:BCC %s_01\n",factor_1,factor_2,label);
  fprintf(stream," LDA abs_SQ_Lo+256,X:SBC abs_SQ_Lo,Y:STA %s\n",result_lo);
  fprintf(stream," LDA abs_SQ_Hi+256,X:SBC abs_SQ_Hi,Y:BCS %s_02\n",label);
  fprintf(stream,".%s_01\n",label);
  fprintf(stream," SEC\n");
  fprintf(stream," LDA abs_SQ_Lo,X:SBC abs_SQ_Lo,Y:STA %s\n",result_lo);
  fprintf(stream," LDA abs_SQ_Hi,X:SBC abs_SQ_Hi,Y\n");
  fprintf(stream,".%s_02\n",label);
  fprintf(stream," BIT %s:BPL %s_03:SBC %s\n",factor_1,label,factor_2);
  fprintf(stream,".%s_03\n",label);
  fprintf(stream," BIT %s:BPL %s_04:SEC:SBC %s\n",factor_2,label,factor_1);
  fprintf(stream,".%s_04\n",label);
  fprintf(stream," STA %s\n",result_hi);
  fprintf(stream,"\n");
}

void expand2(FILE *stream,
             char *result)
{
  fprintf(stream," SEC\n");
  fprintf(stream," LDA zp_temp1:SBC zp_temp2:STA zp_temp\n");
  fprintf(stream," LDA zp_temp1+1:SBC zp_temp2+1\n");
  fprintf(stream," ASL zp_temp:ROL A\n");
  fprintf(stream," ASL zp_temp:ROL A\n");
  fprintf(stream," ASL zp_temp:ADC #0\n");
  fprintf(stream," STA %s\n",result);
  fprintf(stream,"\n");
}

void expand3(FILE *stream,
             char *result)
{
  fprintf(stream," CLC\n");
  fprintf(stream," LDA zp_temp1:ADC zp_temp2:STA zp_temp\n");
  fprintf(stream," LDA zp_temp1+1:ADC zp_temp2+1\n");
  fprintf(stream," ASL zp_temp:ROL A\n");
  fprintf(stream," ASL zp_temp:ROL A\n");
  fprintf(stream," ASL zp_temp:ADC #0\n");
  fprintf(stream," STA %s\n",result);
  fprintf(stream,"\n");
}

int main(int argc, char *argv[])
{
  FILE *stream;
  if(NULL == (stream = fopen("source.00.txt","wt"))) exit(EXIT_FAILURE);

  
  /* ** start of loop, load vertex values into temporaries */
  fprintf(stream,".Geometry\n");
  fprintf(stream," LDX #0\n");
  fprintf(stream,".Geometry_00\n");
  fprintf(stream," STX zp_vertex\n");
  fprintf(stream," LDA abs_X,X:STA zp_x1\n");
  fprintf(stream," LDA abs_Y,X:STA zp_y1\n");
  fprintf(stream," LDA abs_Z,X:STA zp_z1\n");
  fprintf(stream,"\n");

  /* ** rotate around all 3 axes */
  expand0(stream,"zp_ax");

  expand1(stream,"zp_cos","zp_y1","zp_temp1","zp_temp1+1","Multiply_01");
  expand1(stream,"zp_sin","zp_z1","zp_temp2","zp_temp2+1","Multiply_02");
  expand2(stream,"zp_y2");

  expand1(stream,"zp_sin","zp_y1","zp_temp1","zp_temp1+1","Multiply_03");
  expand1(stream,"zp_cos","zp_z1","zp_temp2","zp_temp2+1","Multiply_04");
  expand3(stream,"zp_z2");

  expand0(stream,"zp_ay");

  expand1(stream,"zp_cos","zp_z2","zp_temp1","zp_temp1+1","Multiply_05");
  expand1(stream,"zp_sin","zp_x1","zp_temp2","zp_temp2+1","Multiply_06");
  expand2(stream,"zp_z1");

  expand1(stream,"zp_sin","zp_z2","zp_temp1","zp_temp1+1","Multiply_07");
  expand1(stream,"zp_cos","zp_x1","zp_temp2","zp_temp2+1","Multiply_08");
  expand3(stream,"zp_x2");

  expand0(stream,"zp_az");

  expand1(stream,"zp_cos","zp_x2","zp_temp1","zp_temp1+1","Multiply_09");
  expand1(stream,"zp_sin","zp_y2","zp_temp2","zp_temp2+1","Multiply_10");
  expand2(stream,"zp_x1");

  expand1(stream,"zp_sin","zp_x2","zp_temp1","zp_temp1+1","Multiply_11");
  expand1(stream,"zp_cos","zp_y2","zp_temp2","zp_temp2+1","Multiply_12");
  expand3(stream,"zp_y1");

  /* ** project and store resulting screen co-ordinates */
  fprintf(stream,".Geometry_xx\n");
  fprintf(stream," LDX zp_y1\n");
  fprintf(stream," LDA abs_P,X:STA zp_P\n"); /* zp_P: same adr. as zp_sin */
  fprintf(stream," LDA abs_Q,X:STA zp_Q\n"); /* zp_Q: same adr. as zp_cos */
  fprintf(stream,"\n");

  expand1(stream,"zp_x1","zp_P","zp_temp1","zp_temp1+1","Multiply_13");

  fprintf(stream," LDX zp_vertex\n"); 
  fprintf(stream," LDA zp_temp1+1\n"); /* peephole against STA zp_temp1+1 in Multiply_13! */
  fprintf(stream," ASL zp_temp1:ROL A\n");
  fprintf(stream," ASL zp_temp1:ROL A\n");
  fprintf(stream," ASL zp_temp1:ADC #48:STA abs_U,X\n");
  fprintf(stream,"\n");

  expand1(stream,"zp_z1","zp_Q","zp_temp2","zp_temp2+1","Multiply_14");

  fprintf(stream," LDX zp_vertex\n"); 
  fprintf(stream," LDA zp_temp2+1\n"); /* peephole against STA zp_temp2+1 in Multiply_14! */
  fprintf(stream," ASL zp_temp2:ROL A\n");
  fprintf(stream," ASL zp_temp2:ROL A\n");
  fprintf(stream," ASL zp_temp2:ADC #0:STA zp_temp\n");
  fprintf(stream," SEC:LDA #80:SBC zp_temp:STA abs_V,X\n");
  fprintf(stream,"\n");

  /* ** end of loop */
  fprintf(stream," INX\n");
  fprintf(stream," CPX #8\n");
  fprintf(stream," BEQ Geometry_zz\n");
  fprintf(stream," JMP Geometry_00\n");
  fprintf(stream,".Geometry_zz\n");
  fprintf(stream," RTS\n");

  fclose(stream);

  exit(EXIT_SUCCESS);
}
You see there is a section "** rotate around all 3 axes" - take the time and compare it with lines 30..32 of the cube rotator in the Dec 30th post. Each of the original BASIC statements finds a counterpart in the macro/template expansion process!

The emitted, "raw" assembly code then has its labels unified with the "Geometry_XX" naming scheme and also boilerplate added to support the actual assembly, here's the result:

Code: Select all

REM>geometry
:
zp_ax = &03:REM ** -> &55
zp_ay = &04:REM ** -> &56
zp_az = &05:REM ** -> &57
zp_vertex = &58
zp_x1 = &59
zp_y1 = &5A
zp_z1 = &5B
zp_x2 = &5C
zp_y2 = &5D
zp_z2 = &5E
zp_sin = &5F:zp_P = &5F
zp_cos = &60:zp_Q = &60
zp_temp1 = &61:REM ** 16 bit
zp_temp2 = &63:REM ** 16 bit
zp_temp = &65
:
abs_X = &3300
abs_Y = &3300 +  32
abs_Z = &3300 +  64
abs_U = &3300 +  96
abs_V = &3300 + 128
:
abs_SQ_Lo = &3400
abs_SQ_Hi = &3600
abs_P = &3800
abs_Q = &3900
abs_SIN = &3A00
:
DIM code 4096
:
FOR pass=4 TO 7 STEP 3
P%=&3B65-2:O%=code
[OPT pass
 EQUW P%+2

.Geometry
 LDX #0
.Geometry_00
 STX zp_vertex
 LDA abs_X,X:STA zp_x1
 LDA abs_Y,X:STA zp_y1
 LDA abs_Z,X:STA zp_z1

 LDX zp_ax
 LDA abs_SIN,X   :STA zp_sin
 LDA abs_SIN+64,X:STA zp_cos

 SEC:LDA zp_cos:SBC zp_y1:BCS Geometry_01:EOR #255:ADC #1
.Geometry_01
 TAY:CLC:LDA zp_cos:ADC zp_y1:TAX:BCC Geometry_02
 LDA abs_SQ_Lo+256,X:SBC abs_SQ_Lo,Y:STA zp_temp1
 LDA abs_SQ_Hi+256,X:SBC abs_SQ_Hi,Y:BCS Geometry_03
.Geometry_02
 SEC
 LDA abs_SQ_Lo,X:SBC abs_SQ_Lo,Y:STA zp_temp1
 LDA abs_SQ_Hi,X:SBC abs_SQ_Hi,Y
.Geometry_03
 BIT zp_cos:BPL Geometry_04:SBC zp_y1
.Geometry_04
 BIT zp_y1:BPL Geometry_05:SEC:SBC zp_cos
.Geometry_05
 STA zp_temp1+1

 SEC:LDA zp_sin:SBC zp_z1:BCS Geometry_06:EOR #255:ADC #1
.Geometry_06
 TAY:CLC:LDA zp_sin:ADC zp_z1:TAX:BCC Geometry_07
 LDA abs_SQ_Lo+256,X:SBC abs_SQ_Lo,Y:STA zp_temp2
 LDA abs_SQ_Hi+256,X:SBC abs_SQ_Hi,Y:BCS Geometry_08
.Geometry_07
 SEC
 LDA abs_SQ_Lo,X:SBC abs_SQ_Lo,Y:STA zp_temp2
 LDA abs_SQ_Hi,X:SBC abs_SQ_Hi,Y
.Geometry_08
 BIT zp_sin:BPL Geometry_09:SBC zp_z1
.Geometry_09
 BIT zp_z1:BPL Geometry_10:SEC:SBC zp_sin
.Geometry_10
 STA zp_temp2+1

 SEC
 LDA zp_temp1:SBC zp_temp2:STA zp_temp
 LDA zp_temp1+1:SBC zp_temp2+1
 ASL zp_temp:ROL A
 ASL zp_temp:ROL A
 ASL zp_temp:ADC #0
 STA zp_y2

 SEC:LDA zp_sin:SBC zp_y1:BCS Geometry_11:EOR #255:ADC #1
.Geometry_11
 TAY:CLC:LDA zp_sin:ADC zp_y1:TAX:BCC Geometry_12
 LDA abs_SQ_Lo+256,X:SBC abs_SQ_Lo,Y:STA zp_temp1
 LDA abs_SQ_Hi+256,X:SBC abs_SQ_Hi,Y:BCS Geometry_13
.Geometry_12
 SEC
 LDA abs_SQ_Lo,X:SBC abs_SQ_Lo,Y:STA zp_temp1
 LDA abs_SQ_Hi,X:SBC abs_SQ_Hi,Y
.Geometry_13
 BIT zp_sin:BPL Geometry_14:SBC zp_y1
.Geometry_14
 BIT zp_y1:BPL Geometry_15:SEC:SBC zp_sin
.Geometry_15
 STA zp_temp1+1

 SEC:LDA zp_cos:SBC zp_z1:BCS Geometry_16:EOR #255:ADC #1
.Geometry_16
 TAY:CLC:LDA zp_cos:ADC zp_z1:TAX:BCC Geometry_17
 LDA abs_SQ_Lo+256,X:SBC abs_SQ_Lo,Y:STA zp_temp2
 LDA abs_SQ_Hi+256,X:SBC abs_SQ_Hi,Y:BCS Geometry_18
.Geometry_17
 SEC
 LDA abs_SQ_Lo,X:SBC abs_SQ_Lo,Y:STA zp_temp2
 LDA abs_SQ_Hi,X:SBC abs_SQ_Hi,Y
.Geometry_18
 BIT zp_cos:BPL Geometry_19:SBC zp_z1
.Geometry_19
 BIT zp_z1:BPL Geometry_20:SEC:SBC zp_cos
.Geometry_20
 STA zp_temp2+1

 CLC
 LDA zp_temp1:ADC zp_temp2:STA zp_temp
 LDA zp_temp1+1:ADC zp_temp2+1
 ASL zp_temp:ROL A
 ASL zp_temp:ROL A
 ASL zp_temp:ADC #0
 STA zp_z2

 LDX zp_ay
 LDA abs_SIN,X   :STA zp_sin
 LDA abs_SIN+64,X:STA zp_cos

 SEC:LDA zp_cos:SBC zp_z2:BCS Geometry_21:EOR #255:ADC #1
.Geometry_21
 TAY:CLC:LDA zp_cos:ADC zp_z2:TAX:BCC Geometry_22
 LDA abs_SQ_Lo+256,X:SBC abs_SQ_Lo,Y:STA zp_temp1
 LDA abs_SQ_Hi+256,X:SBC abs_SQ_Hi,Y:BCS Geometry_23
.Geometry_22
 SEC
 LDA abs_SQ_Lo,X:SBC abs_SQ_Lo,Y:STA zp_temp1
 LDA abs_SQ_Hi,X:SBC abs_SQ_Hi,Y
.Geometry_23
 BIT zp_cos:BPL Geometry_24:SBC zp_z2
.Geometry_24
 BIT zp_z2:BPL Geometry_25:SEC:SBC zp_cos
.Geometry_25
 STA zp_temp1+1

 SEC:LDA zp_sin:SBC zp_x1:BCS Geometry_26:EOR #255:ADC #1
.Geometry_26
 TAY:CLC:LDA zp_sin:ADC zp_x1:TAX:BCC Geometry_27
 LDA abs_SQ_Lo+256,X:SBC abs_SQ_Lo,Y:STA zp_temp2
 LDA abs_SQ_Hi+256,X:SBC abs_SQ_Hi,Y:BCS Geometry_28
.Geometry_27
 SEC
 LDA abs_SQ_Lo,X:SBC abs_SQ_Lo,Y:STA zp_temp2
 LDA abs_SQ_Hi,X:SBC abs_SQ_Hi,Y
.Geometry_28
 BIT zp_sin:BPL Geometry_29:SBC zp_x1
.Geometry_29
 BIT zp_x1:BPL Geometry_30:SEC:SBC zp_sin
.Geometry_30
 STA zp_temp2+1

 SEC
 LDA zp_temp1:SBC zp_temp2:STA zp_temp
 LDA zp_temp1+1:SBC zp_temp2+1
 ASL zp_temp:ROL A
 ASL zp_temp:ROL A
 ASL zp_temp:ADC #0
 STA zp_z1

 SEC:LDA zp_sin:SBC zp_z2:BCS Geometry_31:EOR #255:ADC #1
.Geometry_31
 TAY:CLC:LDA zp_sin:ADC zp_z2:TAX:BCC Geometry_32
 LDA abs_SQ_Lo+256,X:SBC abs_SQ_Lo,Y:STA zp_temp1
 LDA abs_SQ_Hi+256,X:SBC abs_SQ_Hi,Y:BCS Geometry_33
.Geometry_32
 SEC
 LDA abs_SQ_Lo,X:SBC abs_SQ_Lo,Y:STA zp_temp1
 LDA abs_SQ_Hi,X:SBC abs_SQ_Hi,Y
.Geometry_33
 BIT zp_sin:BPL Geometry_34:SBC zp_z2
.Geometry_34
 BIT zp_z2:BPL Geometry_35:SEC:SBC zp_sin
.Geometry_35
 STA zp_temp1+1

 SEC:LDA zp_cos:SBC zp_x1:BCS Geometry_36:EOR #255:ADC #1
.Geometry_36
 TAY:CLC:LDA zp_cos:ADC zp_x1:TAX:BCC Geometry_37
 LDA abs_SQ_Lo+256,X:SBC abs_SQ_Lo,Y:STA zp_temp2
 LDA abs_SQ_Hi+256,X:SBC abs_SQ_Hi,Y:BCS Geometry_38
.Geometry_37
 SEC
 LDA abs_SQ_Lo,X:SBC abs_SQ_Lo,Y:STA zp_temp2
 LDA abs_SQ_Hi,X:SBC abs_SQ_Hi,Y
.Geometry_38
 BIT zp_cos:BPL Geometry_39:SBC zp_x1
.Geometry_39
 BIT zp_x1:BPL Geometry_40:SEC:SBC zp_cos
.Geometry_40
 STA zp_temp2+1

 CLC
 LDA zp_temp1:ADC zp_temp2:STA zp_temp
 LDA zp_temp1+1:ADC zp_temp2+1
 ASL zp_temp:ROL A
 ASL zp_temp:ROL A
 ASL zp_temp:ADC #0
 STA zp_x2

 LDX zp_az
 LDA abs_SIN,X   :STA zp_sin
 LDA abs_SIN+64,X:STA zp_cos

 SEC:LDA zp_cos:SBC zp_x2:BCS Geometry_41:EOR #255:ADC #1
.Geometry_41
 TAY:CLC:LDA zp_cos:ADC zp_x2:TAX:BCC Geometry_42
 LDA abs_SQ_Lo+256,X:SBC abs_SQ_Lo,Y:STA zp_temp1
 LDA abs_SQ_Hi+256,X:SBC abs_SQ_Hi,Y:BCS Geometry_43
.Geometry_42
 SEC
 LDA abs_SQ_Lo,X:SBC abs_SQ_Lo,Y:STA zp_temp1
 LDA abs_SQ_Hi,X:SBC abs_SQ_Hi,Y
.Geometry_43
 BIT zp_cos:BPL Geometry_44:SBC zp_x2
.Geometry_44
 BIT zp_x2:BPL Geometry_45:SEC:SBC zp_cos
.Geometry_45
 STA zp_temp1+1

 SEC:LDA zp_sin:SBC zp_y2:BCS Geometry_46:EOR #255:ADC #1
.Geometry_46
 TAY:CLC:LDA zp_sin:ADC zp_y2:TAX:BCC Geometry_47
 LDA abs_SQ_Lo+256,X:SBC abs_SQ_Lo,Y:STA zp_temp2
 LDA abs_SQ_Hi+256,X:SBC abs_SQ_Hi,Y:BCS Geometry_48
.Geometry_47
 SEC
 LDA abs_SQ_Lo,X:SBC abs_SQ_Lo,Y:STA zp_temp2
 LDA abs_SQ_Hi,X:SBC abs_SQ_Hi,Y
.Geometry_48
 BIT zp_sin:BPL Geometry_49:SBC zp_y2
.Geometry_49
 BIT zp_y2:BPL Geometry_50:SEC:SBC zp_sin
.Geometry_50
 STA zp_temp2+1

 SEC
 LDA zp_temp1:SBC zp_temp2:STA zp_temp
 LDA zp_temp1+1:SBC zp_temp2+1
 ASL zp_temp:ROL A
 ASL zp_temp:ROL A
 ASL zp_temp:ADC #0
 STA zp_x1

 SEC:LDA zp_sin:SBC zp_x2:BCS Geometry_51:EOR #255:ADC #1
.Geometry_51
 TAY:CLC:LDA zp_sin:ADC zp_x2:TAX:BCC Geometry_52
 LDA abs_SQ_Lo+256,X:SBC abs_SQ_Lo,Y:STA zp_temp1
 LDA abs_SQ_Hi+256,X:SBC abs_SQ_Hi,Y:BCS Geometry_53
.Geometry_52
 SEC
 LDA abs_SQ_Lo,X:SBC abs_SQ_Lo,Y:STA zp_temp1
 LDA abs_SQ_Hi,X:SBC abs_SQ_Hi,Y
.Geometry_53
 BIT zp_sin:BPL Geometry_54:SBC zp_x2
.Geometry_54
 BIT zp_x2:BPL Geometry_55:SEC:SBC zp_sin
.Geometry_55
 STA zp_temp1+1

 SEC:LDA zp_cos:SBC zp_y2:BCS Geometry_56:EOR #255:ADC #1
.Geometry_56
 TAY:CLC:LDA zp_cos:ADC zp_y2:TAX:BCC Geometry_57
 LDA abs_SQ_Lo+256,X:SBC abs_SQ_Lo,Y:STA zp_temp2
 LDA abs_SQ_Hi+256,X:SBC abs_SQ_Hi,Y:BCS Geometry_58
.Geometry_57
 SEC
 LDA abs_SQ_Lo,X:SBC abs_SQ_Lo,Y:STA zp_temp2
 LDA abs_SQ_Hi,X:SBC abs_SQ_Hi,Y
.Geometry_58
 BIT zp_cos:BPL Geometry_59:SBC zp_y2
.Geometry_59
 BIT zp_y2:BPL Geometry_60:SEC:SBC zp_cos
.Geometry_60
 STA zp_temp2+1

 CLC
 LDA zp_temp1:ADC zp_temp2:STA zp_temp
 LDA zp_temp1+1:ADC zp_temp2+1
 ASL zp_temp:ROL A
 ASL zp_temp:ROL A
 ASL zp_temp:ADC #0
 STA zp_y1

.Geometry_61
 LDX zp_y1
 LDA abs_P,X:STA zp_P
 LDA abs_Q,X:STA zp_Q

 SEC:LDA zp_x1:SBC zp_P:BCS Geometry_62:EOR #255:ADC #1
.Geometry_62
 TAY:CLC:LDA zp_x1:ADC zp_P:TAX:BCC Geometry_63
 LDA abs_SQ_Lo+256,X:SBC abs_SQ_Lo,Y:STA zp_temp1
 LDA abs_SQ_Hi+256,X:SBC abs_SQ_Hi,Y:BCS Geometry_64
.Geometry_63
 SEC
 LDA abs_SQ_Lo,X:SBC abs_SQ_Lo,Y:STA zp_temp1
 LDA abs_SQ_Hi,X:SBC abs_SQ_Hi,Y
.Geometry_64
 BIT zp_x1:BPL Geometry_65:SBC zp_P
.Geometry_65
 BIT zp_P:BPL Geometry_66:SEC:SBC zp_x1
.Geometry_66
 STA zp_temp1+1

 LDX zp_vertex
 LDA zp_temp1+1
 ASL zp_temp1:ROL A
 ASL zp_temp1:ROL A
 ASL zp_temp1:ADC #80:STA abs_U,X

 SEC:LDA zp_z1:SBC zp_Q:BCS Geometry_67:EOR #255:ADC #1
.Geometry_67
 TAY:CLC:LDA zp_z1:ADC zp_Q:TAX:BCC Geometry_68
 LDA abs_SQ_Lo+256,X:SBC abs_SQ_Lo,Y:STA zp_temp2
 LDA abs_SQ_Hi+256,X:SBC abs_SQ_Hi,Y:BCS Geometry_69
.Geometry_68
 SEC
 LDA abs_SQ_Lo,X:SBC abs_SQ_Lo,Y:STA zp_temp2
 LDA abs_SQ_Hi,X:SBC abs_SQ_Hi,Y
.Geometry_69
 BIT zp_z1:BPL Geometry_70:SBC zp_Q
.Geometry_70
 BIT zp_Q:BPL Geometry_71:SEC:SBC zp_z1
.Geometry_71
 STA zp_temp2+1

 LDX zp_vertex
 LDA zp_temp2+1
 ASL zp_temp2:ROL A
 ASL zp_temp2:ROL A
 ASL zp_temp2:ADC #0:STA zp_temp
 SEC:LDA #96:SBC zp_temp:STA abs_V,X

 INX
 CPX #8
 BEQ Geometry_72
 JMP Geometry_00
.Geometry_72
 RTS
]
NEXT
:
OSCLI "Save code &"+STR$~code+" &"+STR$~O%
The attached archive contains the C program and three workstages of this source code: "source.00.txt", the original output of the C program; "source.01.txt", with unified labels, and "source.02.txt" with all the added boilerplate. Seeing this source in full should make it clear that delegating its creation to a C program is much preferable over writing it by hand. :)


For the correct function of the machine code, a bunch of tables also is necessary. These are referenced in the source by the following labels:
  • abs_SQ_Lo: squares table, 512 low bytes,
  • abs_SQ_Hi: squares table, 512 high bytes,
  • abs_P: horizontal reciprocals, 256 bytes, 2:6 fixpoint,
  • abs_Q: vertical reciprocals, 256 bytes, 2:6 fixpoint,
  • abs_SIN: combined sine/cosine table, 320 bytes, 2:6 fixpoint.
The following BASIC program generates these tables and stores them as a single PRG file. Furthermore, a 'patch' file for the NTSC values of the vertical projection is also generated. It is loaded 'over' the PAL version when the main program is started on an NTSC VIC-20:

Code: Select all

10 POKE55,0:POKE56,52:CLR
11 :
12 AR=5/3:XS=96:YS=XS*AR:REM ** CALCULATE PAL VERSION FIRST
13 :
14 DEFFNFX(X)=INT(64*X+0.5)
15 DEFFNCV(X)=INT(X/64+0.5)
16 :
17 FORX=0TO511
18 SQ=INT(X*X/4)
19 HI=INT(SQ/256)
20 LO=SQ-256*HI
21 POKE13312+X,LO
22 POKE13824+X,HI
23 NEXT
24 :
25 FORU=0TO255:S=U+256*(U>=128):POKE14336+U,FNFX(XS/(S+FNFX(4.0))):NEXT
26 FORU=0TO255:S=U+256*(U>=128):POKE14592+U,FNFX(YS/(S+FNFX(4.0))):NEXT
27 FORT=0TO319:S=FNFX(SIN({PI}*T/128)):U=S-256*(S<0):POKE14848+T,U:NEXT
28 :
29 DN=PEEK(186)
30 OPEN15,DN,15,"S0:TABLES":CLOSE15
31 SYS57809"TABLES",DN:POKE193,0:POKE194,52
32 POKE780,193:POKE781,64:POKE782,59:SYS65496
33 :
34 AR=3/2:XS=96:YS=XS*AR:REM ** CALCULATE NTSC PATCH FOR Q() TABLE
35 :
36 FORU=0TO255:S=U+256*(U>=128):POKE14592+U,FNFX(YS/(S+FNFX(4.0))):NEXT
37 :
38 OPEN15,DN,15,"S0:NTSC PATCH":CLOSE15
39 SYS57809"NTSC PATCH",DN:POKE193,0:POKE194,57
40 POKE780,193:POKE781,00:POKE782,58:SYS65496
41 :
42 END
43 :
44 REM ** TABLE GENERATOR FOR GEOMETRY ENGINE WRITTEN 2025-01-02 BY MICHAEL KIRCHER
In essence, in lines 25..27 those are the same formulas that were used before to calculate the arrays S%(...), P%(...) and Q%(...). We didn't need to calculate the square array in the Dec 30th post, as we fully trusted BASIC then to get things right (and anyway, we already had tested the multiply routine with square tables in the Dec 22nd post!). With the P and Q byte arrays, the indexing now uses 2s-complement.


The machine code and tables are now loaded by the main program, where the geometry engine collapses into a single SYS call in line 24!

Code: Select all

10 POKE55,0:POKE56,51:CLR:DN=PEEK(186)
11 :
12 N$="CODE":GOSUB38
13 N$="TABLES":GOSUB38
14 IFPEEK(60900)=5THENN$="NTSC PATCH":GOSUB38
15 :
16 DIM U(7),V(7):U=13152:V=13184:G=15205
17 :
18 FORT=0TO7:READA:POKE13056+T,A:NEXT:DATA 192,192,192,192, 64, 64, 64, 64
19 FORT=0TO7:READA:POKE13088+T,A:NEXT:DATA 192, 64, 64,192,192, 64, 64,192
20 FORT=0TO7:READA:POKE13120+T,A:NEXT:DATA  64, 64,192,192, 64, 64,192,192
21 :
22 @ON:@CLR:POKE3,0:POKE4,0:POKE5,0:X1=31:Y1=15:X2=128:Y2=176
23 :
24 SYSG:FORT=0TO7:U(T)=PEEK(U+T):V(T)=PEEK(V+T):NEXT
25 :
26 @CLR:@1,X1,Y1TOX2,Y1:@1,X2,Y2TOX1,Y2:@1,X2,Y1TOX2,Y2:@1,X1,Y2TOX1,Y1
27 @1,U(0),V(0)TOU(1),V(1):@1,U(4),V(4)TOU(5),V(5):@1,U(0),V(0)TOU(4),V(4)
28 @1,U(1),V(1)TOU(2),V(2):@1,U(5),V(5)TOU(6),V(6):@1,U(1),V(1)TOU(5),V(5)
29 @1,U(2),V(2)TOU(3),V(3):@1,U(6),V(6)TOU(7),V(7):@1,U(2),V(2)TOU(6),V(6)
30 @1,U(3),V(3)TOU(0),V(0):@1,U(7),V(7)TOU(4),V(4):@1,U(3),V(3)TOU(7),V(7)
31 :
32 POKE3,PEEK(3)+3AND255:POKE4,PEEK(4)+5AND255:POKE5,PEEK(5)-7AND255
33 :
34 GETA$:IFA$=""THEN24
35 @RETURN
36 END
37 :
38 SYS57809(N$),DN,1:POKE780,0:SYS65493:RETURN
39 :
40 REM ** MG CUBE ANIMATOR BLENDED VERSION WRITTEN 2025-01-02 BY MICHAEL KIRCHER
For reference:
  • Line 10 sets up protected RAM for the machine code and tables,
  • Lines 12..14 load the machine code and tables,
  • Lines 18..20 write the object definition to the fixpoint arrays at addresses abs_X, abs_Y, abs_Z,
  • Line 22 inits the graphics screen and the rotation angles. X1, Y1, X2 and Y2 hold the rectangle co-ordinates for the draw commands in line 26,
  • Line 24 executes the geometry engine and transfers the results to the arrays U(...) and V(...),
  • Line 26 clears the screen and draws the view rectangle,
  • Lines 27..30 draw the rotated cube,
  • Line 32 advances the angles, and finally,
  • Line 34 continues the animation until a key is pressed.
  • Line 38 contains a sub-routine to load PRG files.
It is quite instructive to find out how fast the SYS call in line 24 actually is. Next step then will be going all-out to machine code.
User avatar
Mike
Herr VC
Posts: 5130
Joined: Wed Dec 01, 2004 1:57 pm
Location: Munich, Germany
Occupation: electrical engineer

Re: Writing a 3D geometry engine from scratch

Post by Mike »

What happened so far:

Using MINIGRAFIK as test environment, on the VIC-20, the "Hello World!" of 3D graphics, a rotating wireframe cube was brought into existence - first completely on API-level, doing all math in interpreted BASIC first, and then translating all that math to 6502 machine language, using fixpoint arithmetic.

From the view of BASIC, the calculation of the transformed vertices now happens nearly instantanous. If we try to measure the elapsed time before and after SYSG in the previous post's main program, it comes out at 1 TI clock, i.e. roughly 1/60 second.

The line routine of MINIGRAFIK plots about 4000 pixels per second. It also takes care of the attribute data in the colour RAM. The latter action is not strictly necessary, as we are dealing with monochrome graphics here; it is sufficient to init the colour RAM once. @CLR already does so.

For the time being, we will use a line routine I posted here in Denial some time ago in another thread. The routine is already quite fast, about 20000 pixels per second. Before we go about to use it, some preparations are necessary though:

In BASIC, the line commands retrieve their co-ordinates from the two arrays U(...) and V(...). These arrays in turn are filled from byte arrays written to by the geometry engine. Just putting in a faster line routine is not enough, the parameter passing to it also needs to be done in machine code. This eliminates the time lost in converting the transformed co-ordinates from byte values to float and back again!

Effectively we turn this:

Code: Select all

24 [...] FORT=0TO7:U(T)=PEEK(U+T):V(T)=PEEK(V+T):NEXT
25 :
26 [...]
27 @1,U(0),V(0)TOU(1),V(1):@1,U(4),V(4)TOU(5),V(5):@1,U(0),V(0)TOU(4),V(4)
28 @1,U(1),V(1)TOU(2),V(2):@1,U(5),V(5)TOU(6),V(6):@1,U(1),V(1)TOU(5),V(5)
29 @1,U(2),V(2)TOU(3),V(3):@1,U(6),V(6)TOU(7),V(7):@1,U(2),V(2)TOU(6),V(6)
30 @1,U(3),V(3)TOU(0),V(0):@1,U(7),V(7)TOU(4),V(4):@1,U(3),V(3)TOU(7),V(7)
into this:

Code: Select all

.Draw
 LDY #0
.Draw_00
 TYA:PHA
 LDX Draw_01,Y
 LDA abs_U,X:STA x1
 LDA abs_V,X:STA y1
 LDX Draw_02,Y
 LDA abs_U,X:STA x2
 LDA abs_V,X:STA y2
 JSR Line
 PLA:TAY
 INY
 CPY #12
 BNE Draw_00
 RTS
.Draw_01
 EQUB 0:EQUB 4:EQUB 0
 EQUB 1:EQUB 5:EQUB 1
 EQUB 2:EQUB 6:EQUB 2
 EQUB 3:EQUB 7:EQUB 3
.Draw_02
 EQUB 1:EQUB 5:EQUB 4
 EQUB 2:EQUB 6:EQUB 5
 EQUB 3:EQUB 7:EQUB 6
 EQUB 0:EQUB 4:EQUB 7
The table in Draw_01 contains the indices of the U(...) and V(...) arrays in lines 27..30 before the TO, i.e. the start point indices; the table in Draw_02 contains the indices after TO, i.e. the end point indices. The co-ordinates values are then directly transferred from the abs_U and abs_V byte arrays to the co-ordinate parameters of the line routine, for each of the 12 cube edges.

Finally, we will optimize the redraw by just clearing the inside of the frame before drawing the new lines. Not only saves this time on the clear step itself, it also is not necessary anymore to redraw the frame on each animation step. The routine is fairly unrolled over all bitmap columns, "Window" is defined as the address of the top-left corner byte in the surrounding frame:

Code: Select all

.Clear
 LDA #0
 LDY #160
.Clear_00
 STA Window - 1 + 11*192,Y
 STA Window - 1 + 10*192,Y
 STA Window - 1 +  9*192,Y
 STA Window - 1 +  8*192,Y
 STA Window - 1 +  7*192,Y
 STA Window - 1 +  6*192,Y
 STA Window - 1 +  5*192,Y
 STA Window - 1 +  4*192,Y
 STA Window - 1 +  3*192,Y
 STA Window - 1 +  2*192,Y
 STA Window - 1 +  1*192,Y
 STA Window - 1         ,Y
 DEY
 BNE Clear_00
We reuse the geometry engine from the preceding post. The new drawing engine calls the geometry engine directly by itself, so we do not need to do two SYS commands. Upon the finished assembly, the source code prints the new address for the machine code SYS:

Image

... which happens to be $2E97 = 11927. The object code is written to the file "code2".

The line routine needs three big tables, two of which contain the low bytes and high bytes of the bitmap columns. The third table contains the pixel bit positions. These three tables, along with the cube co-ordinates, are written into another file, "tables2":

Code: Select all

10 POKE55,0:POKE56,48:CLR
11 :
12 FORT=12288TO13127:POKET,0:NEXT
13 :
14 BI=128:FORX=0TO159
15 AD=4352+192*INT(X/8)
16 HI=INT(AD/256):LO=AD-256*HI
17 POKE12288+X,LO
18 POKE12544+X,HI
19 POKE12800+X,BI
20 BI=BI/2:IFBI<1THENBI=128
21 NEXT
22 :
23 FORT=0TO7:READA:POKE13056+T,A:NEXT:DATA 192,192,192,192, 64, 64, 64, 64
24 FORT=0TO7:READA:POKE13088+T,A:NEXT:DATA 192, 64, 64,192,192, 64, 64,192
25 FORT=0TO7:READA:POKE13120+T,A:NEXT:DATA  64, 64,192,192, 64, 64,192,192
26 :
27 DN=PEEK(186)
28 OPEN15,DN,15,"S0:TABLES2":CLOSE15
29 SYS57809"TABLES2",DN:POKE193,0:POKE194,48
30 POKE780,193:POKE781,72:POKE782,51:SYS65496
31 :
32 REM ** TABLE GENERATOR 2 FOR DRAWING ENGINE WRITTEN 2025-02-16 BY MICHAEL KIRCHER
All that is left of the BASIC main program now is this (download, run the file BOOT with at least +8K RAM expansion):

Code: Select all

10 POKE55,0:POKE56,46:CLR:DN=PEEK(186)
11 :
12 N$="CODE":GOSUB30
13 N$="TABLES":GOSUB30
14 IFPEEK(60900)=5THENN$="NTSC PATCH":GOSUB30
15 N$="CODE2":GOSUB30
16 N$="TABLES2":GOSUB30
17 :
18 G=11927:POKE3,0:POKE4,0:POKE5,0
19 :
20 @ON:@CLR:@1,31,15TO128,15:@1,128,176TO31,176:@1,128,15TO128,176:@1,31,176TO31,15
21 :
22 SYSG
23 :
24 POKE3,PEEK(3)+3AND255:POKE4,PEEK(4)+5AND255:POKE5,PEEK(5)-7AND255
25 :
26 GETA$:IFA$=""THEN22
27 @RETURN
28 END
29 :
30 SYS57809(N$),DN,1:POKE780,0:SYS65493:RETURN
31 :
32 REM ** MG CUBE ANIMATOR "SCOPE" VERSION WRITTEN 2025-02-16 BY MICHAEL KIRCHER
The animation now runs at roughly 12 frames per second.

Fast, but also very flickery now - hence, "Scope" version. :wink: Half the time is spent in the geometry engine and the remaining BASIC code (mainly, updating the angles) while the cube stays put on screen; the other half of the time is spent on a visible redraw procedure. In VICE, the 'Pause emulation' and 'Advance frame' features show this behaviour in detail.

We will do something about that flickery appearance in the next part ...
User avatar
Mike
Herr VC
Posts: 5130
Joined: Wed Dec 01, 2004 1:57 pm
Location: Munich, Germany
Occupation: electrical engineer

Re: Writing a 3D geometry engine from scratch

Post by Mike »

... and one of the options is to replace the bitmap clear action by undrawing the cube edges, one by one.

By this approach we can expect to reduce the flicker to a good minimum, as the edges stay on screen most of the time. Instead of clearing the bitmap, the screen co-ordinates of the preceding animation phase are re-used - by plotting the lines with EOR instead of ORA we can simply undraw the lines by drawing them twice.

The main loop of the program now looks like this (download, unzip and run the file BOOT with at least +8K RAM):

Code: Select all

.Main
 JSR Geometry

.Draw
 LDY #0
.Draw_00
 TYA:PHA
 LDX Draw_01,Y
 LDA abs_U_old,X:STA x1
 LDA abs_V_old,X:STA y1
 LDX Draw_02,Y
 LDA abs_U_old,X:STA x2
 LDA abs_V_old,X:STA y2
 JSR Line
 PLA:TAY
 TYA:PHA
 LDX Draw_01,Y
 LDA abs_U,X    :STA x1
 LDA abs_V,X    :STA y1
 LDX Draw_02,Y
 LDA abs_U,X    :STA x2
 LDA abs_V,X    :STA y2
 JSR Line
 PLA:TAY
 INY
 CPY #12
 BNE Draw_00

.Save
 LDX #7
.Save_00
 LDA abs_U,X
 STA abs_U_old,X
 LDA abs_V,X
 STA abs_V_old,X
 DEX
 BPL Save_00

 RTS
With the given problem size, the frame rate is about the same as in the 'scope' version. With more lines on screen though, this 'undraw' version is likely to become slower in comparison: the time taken for the clear + draw action is traded in for a two times draw action. The break-even point (in a negative sense) is reached as soon as the time for drawing the object once exceeds the time for clearing the bitmap, regardless in which order the lines are updated.

Unfortunately, especially with fast rotations, it is apparent that some of the edges do not anymore match at the cube corners during the redraw procedure. It looks as if the cube always is on the brink of falling apart!

Image

Some unexpected complexity will also ensue in the code when the display method involves changes of the visible 'pool' of lines. Think of advancing to hidden lines or spawning/removing objects. Extra housekeeping is then necessary to specifically match the lines that are supposed to be updated.

Even if it can be implemented at relatively low cost - mostly, an extra buffer for screen co-ordinates -, this technique then is only feasible if memory is tight, if there is no room for an auxiliary bitmap and if one does not mind the bad visual result.

Things will improve a lot by introducing a shadow buffer.
User avatar
Mike
Herr VC
Posts: 5130
Joined: Wed Dec 01, 2004 1:57 pm
Location: Munich, Germany
Occupation: electrical engineer

Re: Writing a 3D geometry engine from scratch

Post by Mike »

So, what is the purpose of the shadow buffer?

Main issue with the redraw procedure up to now is, that it happens in the display bitmap. The observer sees the deletion of the old animation phase - regardless whether that's a 'screen clear' or 'xor erasing' of the single lines -, and the rendering of the new animation phase. Unless the update is so fast it could be done during the vertical sync time (more precise: in the time the CRT electron beam leaves the display area to the bottom border and re-enters the display area from the upper border), there will always be an intermediate state on screen during redraw.

If the actual update procedure of the display bitmap can be shortened somehow, we can minimize the time that intermediate state is shown on screen.

Now think about a chalkboard in school, in situations where the teacher needed to prepare some text or diagrams on the chalkboard without pupils being able to spot the examination task in advance. The teacher wrote on the backside, and when completed, turned the board ... making the text visible in a fraction of the time it took to write it!

With the introduction of the shadow buffer, we likewise can do the whole redraw in that shadow buffer - hidden from the observer! Only when the rendering is finished, we copy over the shadow buffer to the display buffer. The copy action is much faster than the redraw procedure.

Here's the implementation of the 'shadow' cube (download). Unlike the other examples in this thread, this one requires +16K RAM expansion! As always, unpack the *.zip archive and run the file BOOT.

The line routine needs to be 'notified' it has to draw in the shadow bitmap instead. This requires a subtle change for the table generator, see line 15:

Code: Select all

10 POKE55,0:POKE56,48:CLR
11 :
12 FORT=12288TO13127:POKET,0:NEXT
13 :
14 BI=128:FORX=0TO159
15 AD=20736+192*INT(X/8)
16 HI=INT(AD/256):LO=AD-256*HI
17 POKE12288+X,LO
18 POKE12544+X,HI
19 POKE12800+X,BI
20 BI=BI/2:IFBI<1THENBI=128
21 NEXT
22 :
23 FORT=0TO7:READA:POKE13056+T,A:NEXT:DATA 192,192,192,192, 64, 64, 64, 64
24 FORT=0TO7:READA:POKE13088+T,A:NEXT:DATA 192, 64, 64,192,192, 64, 64,192
25 FORT=0TO7:READA:POKE13120+T,A:NEXT:DATA  64, 64,192,192, 64, 64,192,192
26 :
27 DN=PEEK(186)
28 OPEN15,DN,15,"S0:TABLES5":CLOSE15
29 SYS57809"TABLES5",DN:POKE193,0:POKE194,48
30 POKE780,193:POKE781,72:POKE782,51:SYS65496
31 :
32 REM ** TABLE GENERATOR 5 FOR DRAWING ENGINE WRITTEN 2025-03-22 BY MICHAEL KIRCHER
... where AD=20736+... now addresses from the top-left byte of the shadow bitmap.

The main redraw loop re-introduces the unrolled bitmap clear loop, but that of course now also operates on the shadow bitmap. There is no need for a clear loop in the display buffer, as the newly introduced copy loop makes the clear procedure on the display bitmap redundant. All relevant bytes in the display bitmap are 'touched' anyway, and only once per animation phase --

Code: Select all

Window = &1100 + 4*192 + 16
Shadow = &5100 + 4*192 + 16

[...]

.Clear
 LDA #0
 LDY #160
.Clear_00
 STA Shadow - 1 + 11*192,Y
 STA Shadow - 1 + 10*192,Y
 STA Shadow - 1 +  9*192,Y
 STA Shadow - 1 +  8*192,Y
 STA Shadow - 1 +  7*192,Y
 STA Shadow - 1 +  6*192,Y
 STA Shadow - 1 +  5*192,Y
 STA Shadow - 1 +  4*192,Y
 STA Shadow - 1 +  3*192,Y
 STA Shadow - 1 +  2*192,Y
 STA Shadow - 1 +  1*192,Y
 STA Shadow - 1         ,Y
 DEY
 BNE Clear_00

[...]

.Copy
 LDA #0
 LDY #160
.Clear_00
 LDA Shadow - 1 + 11*192,Y:STA Window - 1 + 11*192,Y
 LDA Shadow - 1 + 10*192,Y:STA Window - 1 + 10*192,Y
 LDA Shadow - 1 +  9*192,Y:STA Window - 1 +  9*192,Y
 LDA Shadow - 1 +  8*192,Y:STA Window - 1 +  8*192,Y
 LDA Shadow - 1 +  7*192,Y:STA Window - 1 +  7*192,Y
 LDA Shadow - 1 +  6*192,Y:STA Window - 1 +  6*192,Y
 LDA Shadow - 1 +  5*192,Y:STA Window - 1 +  5*192,Y
 LDA Shadow - 1 +  4*192,Y:STA Window - 1 +  4*192,Y
 LDA Shadow - 1 +  3*192,Y:STA Window - 1 +  3*192,Y
 LDA Shadow - 1 +  2*192,Y:STA Window - 1 +  2*192,Y
 LDA Shadow - 1 +  1*192,Y:STA Window - 1 +  1*192,Y
 LDA Shadow - 1         ,Y:STA Window - 1         ,Y
 DEY
 BNE Clear_00
As evident from the source, the copy action takes twice the time of the clear action, about 16000 cycles. That is quite fast, and in any case there now is always a 'complete' cube on screen - no disappearing or flickering lines, or lines that do not match at the cube corners as opposed to the 'undraw' version.

However, the update still is not as fast as we could hope for. Not being synchronised to the CRT electron beam scan, the copy procedure can be catched mid-work, so the old animation phase is shown on one part of the screen and the new animation phase on the other part.

This leads to visible tearing artifacts:

Image

The copy loop works 'against the grain', i.e. backwards from higher to lower addresses, upwards on screen. This method at least ensures that these tearing artifacts only occur once during one CRT electron beam scan, at the place where copy action and electron beam meet. On a display system with only one available display bitmap, that is about the best that can be done.

To improve on that, it is necessary that the video chip is able to access two display bitmaps. One of them serves as shadow buffer, the other one is displayed. Upon the finished redraw, the two buffers change roles. This is actually possible with the VIC chip in the VIC-20, but requires us to shrink the bitmap so two of them fit into the internal RAM.

The next part of the workshop thus will dispense with the 160x192 pixel MINIGRAFIK display bitmap and introduce a custom bitmap with 96x160 pixels. That is exactly the size of the frame interior (so - still the same problem size). In addition to that, a timer interrupt synchronized to the electron beam will ensure that a page flip only occurs during the vertical retrace time, fully eliminating the tearing artifacts ...
User avatar
Mike
Herr VC
Posts: 5130
Joined: Wed Dec 01, 2004 1:57 pm
Location: Munich, Germany
Occupation: electrical engineer

Re: Writing a 3D geometry engine from scratch

Post by Mike »

Lots of new stuff in this post, with dissected source code. You have been warned!


The two custom bitmaps now have 96x160 pixels. Not only do we need to setup the bitmap display by ourselves (instead of letting MINIGRAFIK do that mundane task), there are also two subtle details in the geometry engine we need to "fix" first:
  • with the resolution now being 96x160 instead of 160x192, the new center co-ordinates of the screen are X=48, Y=80 (instead of X=80, Y=96), and
  • the angles AX/AY/AZ, provisionally stored at addresses $03..$05 are now supposed to go to addresses $55..$57.
We apply these changes in the source file 'source.06.txt', as follows:

Code: Select all

REM>geometry
:
zp_ax = &55
zp_ay = &56
zp_az = &57
[...]
.Geometry_66
 STA zp_temp1+1

 LDX zp_vertex
 LDA zp_temp1+1
 ASL zp_temp1:ROL A
 ASL zp_temp1:ROL A
 ASL zp_temp1:ADC #48:STA abs_U,X
[...]
.Geometry_71
 STA zp_temp2+1

 LDX zp_vertex
 LDA zp_temp2+1
 ASL zp_temp2:ROL A
 ASL zp_temp2:ROL A
 ASL zp_temp2:ADC #0:STA zp_temp
 SEC:LDA #80:SBC zp_temp:STA abs_V,X

The two 96x160 pixel bitmaps are placed at $1080 and $1880, both with their own address generating text screens, put at $1000 and $1800, respectively. The characters in the text screens start with number $88 and are arranged in column-major order. This is done to ease the job of the text screen setup (see file 'source.07.txt', note the source uses '&' to denote hex):

Code: Select all

.Display
 CLC
 LDA #&88
 TAY
.Display_00
 STA &0F78,Y
 STA &1778,Y
 ADC #&0A
 BCC Display_01
 SBC #&77
.Display_01
 INY
 BNE Display_00
[...]
Both text screens are written to linearly, but the character number has to skip the difference corresponding to the number of bitmap column bytes - with double height characters, the difference is 160/16 = 10, which results in the ADC #$0A command. When there is a carry, the next text line has started, and we need to adjust back the character number. SBC #$77 does the job. When Y overflows, the two text maps have been initialised.

Next thing to do then is set up the screen geometry. The display window is supposed to remain centered, regardless whether the demo runs on PAL or NTSC:

Code: Select all

[...]
 LDY #&03
.Display_02
 CLC
 LDA &EDE4,Y
 ADC Display_05,Y
 STA &9000,Y
 DEY
 BPL Display_02
[...]
.Display_05
 EQUB &0A
 EQUB &06
 EQUB &F6
 EQUB &E7
[...]
A table in the KERNAL at $EDE4 contains the default values for the VIC registers. The offsets at ".Display_05" re-center the display window for 12 text columns and 10 double-height text rows.

The remaining part of the Display sub-routine sets up a VIA timer IRQ, which is synchronised to the raster line just below the display window:

Code: Select all

[...]
 LDX #&86
 LDY #&56
 LDA &EDE5
 CMP #&20
 BCS Display_03
 LDX #&43
 LDY #&42
.Display_03
 CLC
 ADC #&56
 SEI
.Display_04
 CMP &9004
 BNE Display_04
 LDA #IRQ MOD 256
 STA &0314
 LDA #IRQ DIV 256
 STA &0315
 STX &9124
 STY &9125
 CLI
 RTS
The interrupt processing just writes to a memory byte to ultimately notify the foreground process that a interrupt just has happened, that the electron beam has just left the display window area, and that it is save to change the VIC register to the new, freshly rendered animation frame:

Code: Select all

.IRQ
 LDA #&01
 STA IRQ_00
 JMP &EABF
.IRQ_00
 EQUB &00

The call to the Display subroutine happens at the beginning of the Main program loop, which is now fully converted to machine code, including the angle increments:

Code: Select all

.Main
 JSR ClrPage1
 JSR ClrPage2
 JSR Display
 JSR Colour
 LDA #0
 STA zp_ax
 STA zp_ay
 STA zp_az
[...]
The two calls to ClrPage1 and ClrPage2 clear both bitmaps so no debris show up on start-up, Display sets up VIC and timer IRQ, and finally Colour initialises the colour RAM from the current foreground colour. The angles are all set to 0.

In the first iteration, the main loop then sets the VIC register to show page 2 ($EC -> $9005) as display bitmap and 'notifies' the line drawing routine to use page 1 (at $1080) to render stuff, also clearing page 1 first:

Code: Select all

[...]
 LDA #1
.Main_00
 STA Main_04
 TAX
 LDA Main_05-1,X
 STA &9005
 LDA Main_06-1,X
 STA Line_05+6
 CPX #2
 BEQ Main_01
 JSR ClrPage1
 JMP Main_02
.Main_01
 JSR ClrPage2
[...]
In the line routine, the instruction fetching the bitmap address high byte is modified so either high bytes from page 1 or high bytes from page 2 are loaded as bitmap column base pointers.

Geometry and Draw are called, and the angles are updated (the latter action until now still had been part of the BASIC program!):

Code: Select all

[...]
.Main_02
 JSR Geometry
 JSR Draw
 CLC:LDA zp_ax:ADC #3:STA zp_ax
 CLC:LDA zp_ay:ADC #5:STA zp_ay
 SEC:LDA zp_az:SBC #7:STA zp_az
[...]
Now, the main loop clears the IRQ notification, and waits until the IRQ sets it again:

Code: Select all

[...]
 LDA #&00
 STA IRQ_00
.Main_03
 LDA IRQ_00
 BEQ Main_03
[...]
... and now we flip pages. The next iteration will use page 2 (at $1880) as draw page and let VIC show page 1 ($CA -> $9005) for display:

Code: Select all

 SEC
 LDA #3
 SBC Main_04
 JMP Main_00
... and back again on each of the subsequent iterations! The assembly of 'source.07.txt' results in a new start address for the SYS in the BASIC main program:

Image


The table generator for the line drawing routine is updated to reflect both the changed bitmap layout, and the presence of two bitmaps (see lines 14..21):

Code: Select all

10 POKE55,0:POKE56,48:CLR
11 :
12 FORT=12288TO13127:POKET,0:NEXT
13 :
14 BI=128:FORX=0TO95
15 AD=4096+128+160*INT(X/8)
16 HI=INT(AD/256):LO=AD-256*HI
17 POKE12288+X,LO
18 POKE12544+X,HI:POKE12544+128+X,HI+8
19 POKE12800+X,BI
20 BI=BI/2:IFBI<1THENBI=128
21 NEXT
22 :
23 FORT=0TO7:READA:POKE13056+T,A:NEXT:DATA 192,192,192,192, 64, 64, 64, 64
24 FORT=0TO7:READA:POKE13088+T,A:NEXT:DATA 192, 64, 64,192,192, 64, 64,192
25 FORT=0TO7:READA:POKE13120+T,A:NEXT:DATA  64, 64,192,192, 64, 64,192,192
26 :
27 DN=PEEK(186)
28 OPEN15,DN,15,"S0:TABLES7":CLOSE15
29 SYS57809"TABLES7",DN:POKE193,0:POKE194,48
30 POKE780,193:POKE781,72:POKE782,51:SYS65496
31 :
32 REM ** TABLE GENERATOR 7 FOR DRAWING ENGINE WRITTEN 2025-03-28 BY MICHAEL KIRCHER
Line 18 adds in the high bytes of page 2 into a convenient gap of memory usage, with the second POKE command.


Now, what is left of the BASIC main program? Not much more than memory allocation (lowering the roof), a batch load procedure of code and data files, followed by the SYS11671 start command! Here we go (download): unzip the archive and run the file BOOT - note the memory requirements are back to (only) at least +8K RAM expansion:

Code: Select all

10 POKE55,0:POKE56,45:CLR:DN=PEEK(186)
11 :
12 N$="CODE6":GOSUB21
13 N$="TABLES":GOSUB21
14 IFPEEK(60900)=5THENN$="NTSC PATCH":GOSUB21
15 N$="CODE7":GOSUB21
16 N$="TABLES7":GOSUB21
17 :
18 SYS11671
19 END
20 :
21 SYS57809(N$),DN,1:POKE780,0:SYS65493:RETURN
22 :
23 REM ** MG CUBE ANIMATOR "PAGE FLIP" VERSION WRITTEN 2025-03-28 BY MICHAEL KIRCHER
The keys STOP/RESTORE return you to direct mode. You can restart the animation with RUN. Incidentally, all the boot program now does is merely moving the start of BASIC behind the two bitmaps, and run the BASIC main program there. MINIGRAFIK is missing in action. :wink:


With the main loop now completely converted to machine code, and the buffer copy made redundant by page flipping, the demo runs at a sustained 17 frames/second on PAL, and 15 (sometimes 20) frames/second on NTSC - and with

no

tearing

artifacts

anymore. There is something about the "sometimes 20" in the last sentence, though. With higher framerates, they are better kept constant. For the next part of the workshop, we introduce a frame rate limiter because there will be a substantially different CPU load for different animation phases, ...

... with a cube drawn with removed hidden lines!
User avatar
Mike
Herr VC
Posts: 5130
Joined: Wed Dec 01, 2004 1:57 pm
Location: Munich, Germany
Occupation: electrical engineer

Re: Writing a 3D geometry engine from scratch

Post by Mike »

Here's now the version of the cube animator with hidden lines for download:

Image

The archive contains two folders, one for the prototype in BASIC (using MINIGRAFIK as support), one other for the full translation to machine code. In either case, enable a +8K RAM expansion and run the file BOOT.

On PAL, the animation shows a sustained 17 frames/second; NTSC runs at 15 frames/second. In VICE, this can be checked with the 'Advance frame' feature (Shift+Alt+P). Without the frame limiter, the animation would judder between 17 and 25 frames/second on PAL, and between 15 and 20 frames/second on NTSC.


The hidden line algorithm introduces a new data structure in the drawing engine, the object faces. For a wireframe cube, we just need to enumerate all the necessary wireframe edges going from each of the cube vertices to their nearest neighbors. Drawing the cube as solid object though requires us to check the visibility of each edge. For convex objects - i.e. all connecting lines from any two points in the object or on its surface fully pass through the object - that visibility check is fairly easy: if at least one of the two faces to each side of the edge is visible, the edge itself also is visible.

We check the visibility of each of the cube faces by calculating the signed area A of one of its constituent triangles from the triangles' screen (U,V) co-ordinates:

A := ½ · ((u2-u1)·(v3-v1) - (u3-u1)·(v2-v1))

For each of the cube faces, we pick 3 cube vertices and make sure they are arranged counter-clockwise when looking upon that face from the outside. The formula above then results in a positive number confirming the visibility of the face. When the face looks away from the observer, the value of the formula turns negative.

With the given set of cube vertices, we arrive at the following test triangles and their corresponding vertices:

Code: Select all

Face 1 (Z=+1): (+1,-1,+1), (+1,+1,+1), (-1,-1,+1)
Face 2 (Y=-1): (+1,-1,+1), (-1,-1,+1), (-1,-1,-1)
Face 3 (X=+1): (+1,-1,+1), (+1,-1,-1), (+1,+1,-1)
Face 4 (X=-1): (-1,+1,-1), (-1,-1,-1), (-1,-1,+1)
Face 5 (Z=-1): (-1,+1,-1), (+1,+1,-1), (+1,-1,-1)
Face 6 (Y=+1): (-1,+1,-1), (-1,+1,+1), (+1,+1,+1)
This is reflected in the BASIC prototype in lines 26..31 - with a twist:

Code: Select all

26 P1=(U(5)-U(4))*(V(1)-V(4))<(U(1)-U(4))*(V(5)-V(4))
27 P2=(U(0)-U(4))*(V(3)-V(4))<(U(3)-U(4))*(V(0)-V(4))
28 P3=(U(7)-U(4))*(V(6)-V(4))<(U(6)-U(4))*(V(7)-V(4))
29 P4=(U(3)-U(2))*(V(0)-V(2))<(U(0)-U(2))*(V(3)-V(2))
30 P5=(U(6)-U(2))*(V(7)-V(2))<(U(7)-U(2))*(V(6)-V(2))
31 P6=(U(1)-U(2))*(V(5)-V(2))<(U(5)-U(2))*(V(1)-V(2))
First - we're not really interested in the area, but only its sign, therefore we forgo to divide by 2 here. Second, the area is positive when the difference between first and second product is positive, which would imply a greater than sign ">" between first and second product. However, the listing shows a less than sign "<"!?

:
:
:

The answer to the riddle is the conversion to screen co-ordinates: we had to change from the right-handed 3D co-ordinate system to the left-handed 2D screen co-ordinates, and this inverses the sign! Had we first picked out test triangle vertices in clockwise fashion, the sign inversion already would have happened in the world co-ordinate system and I wouldn't need to argue here. :wink:

Next, we define which of the edges belong to a given pair of faces. Enumerating all those results in this list:

Code: Select all

Edge  1 (Z=+1 & X=-1): (-1,+1,+1) to (-1,-1,+1)
Edge  2 (X=-1 & Y=+1): (-1,+1,+1) to (-1,+1,-1)
Edge  3 (Y=+1 & Z=+1): (-1,+1,+1) to (+1,+1,+1)
Edge  4 (Y=-1 & X=-1): (-1,-1,-1) to (-1,-1,+1)
Edge  5 (X=-1 & Z=-1): (-1,-1,-1) to (-1,+1,-1)
Edge  6 (Z=-1 & Y=-1): (-1,-1,-1) to (+1,-1,-1)
Edge  7 (Z=+1 & Y=-1): (+1,-1,+1) to (-1,-1,+1)
Edge  8 (Y=-1 & X=+1): (+1,-1,+1) to (+1,-1,-1)
Edge  9 (X=+1 & Z=+1): (+1,-1,+1) to (+1,+1,+1)
Edge 10 (X=+1 & Z=-1): (+1,+1,-1) to (+1,-1,-1)
Edge 11 (Z=-1 & Y=+1): (+1,+1,-1) to (-1,+1,-1)
Edge 12 (Y=+1 & X=+1): (+1,+1,-1) to (+1,+1,+1)
This is reflected in the BASIC prototype in lines 34..45 which directly execute the corresponding line draw commands:

Code: Select all

34 IF P1 OR P4 THEN:@1,U(1),V(1)TOU(0),V(0)
35 IF P4 OR P6 THEN:@1,U(1),V(1)TOU(2),V(2)
36 IF P6 OR P1 THEN:@1,U(1),V(1)TOU(5),V(5)
37 IF P2 OR P4 THEN:@1,U(3),V(3)TOU(0),V(0)
38 IF P4 OR P5 THEN:@1,U(3),V(3)TOU(2),V(2)
39 IF P5 OR P2 THEN:@1,U(3),V(3)TOU(7),V(7)
40 IF P1 OR P2 THEN:@1,U(4),V(4)TOU(0),V(0)
41 IF P2 OR P3 THEN:@1,U(4),V(4)TOU(7),V(7)
42 IF P3 OR P1 THEN:@1,U(4),V(4)TOU(5),V(5)
43 IF P3 OR P5 THEN:@1,U(6),V(6)TOU(7),V(7)
44 IF P5 OR P6 THEN:@1,U(6),V(6)TOU(2),V(2)
45 IF P6 OR P3 THEN:@1,U(6),V(6)TOU(5),V(5)
Modern 3D graphics APIs and CAD programs do all that work for you. :mrgreen:


The validity of the face data structure and edge visilibity test being confirmed by the BASIC prototype, we set out for the translation to machine code. In the file 'source.08.txt' the new routine Faces in the main loop performs the visibility test:

Code: Select all

.Faces
 LDY #0
.Faces_00
 STY zp_face
 LDX Faces_01,Y:LDA abs_U,X:STA zp_u1:LDA abs_V,X:STA zp_v1
 LDX Faces_02,Y:LDA abs_U,X:STA zp_u2:LDA abs_V,X:STA zp_v2
 LDX Faces_03,Y:LDA abs_U,X:STA zp_u3:LDA abs_V,X:STA zp_v3
 JSR Cross
 LDY zp_face
 STA Faces_04,Y
 INY:CPY #6:BNE Faces_00
 RTS
.Faces_01
 EQUB 4:EQUB 4:EQUB 4:EQUB 2:EQUB 2:EQUB 2
.Faces_02
 EQUB 5:EQUB 0:EQUB 7:EQUB 3:EQUB 6:EQUB 1
.Faces_03
 EQUB 1:EQUB 3:EQUB 6:EQUB 0:EQUB 7:EQUB 5
.Faces_04
 EQUB 0:EQUB 0:EQUB 0:EQUB 0:EQUB 0:EQUB 0
The tables Faces_01, Faces_02 and Faces_03 index the test triangle vertices as used by the BASIC prototype in lines 26..31. The routine in turn calls the sub-routine Cross with the set of triangle screen co-ordinates, and within Cross we see the 16-bit signed multiplication routine once again, instantiated twice. To avoid overflows, the signed difference of the screen V co-ordinates is divided by 2. The result of the comparison is stored in the table Faces_04.

The draw routine is now extended to include the results of the face visibility check. For each edge in the .Draw_00 loop, the five instructions:

Code: Select all

 LDX Draw_02,Y
 LDA Faces_04,X
 LDX Draw_03,Y
 ORA Faces_04,X
 BEQ Draw_01
check the visibility of the adjacent faces. If neither of them is visible, BEQ skips the edge. The tables Draw_02 and Draw_03 contain the face numbers (re-indexed to 0..5) and the tables Draw_04 and Draw_05 contain the indices of the start and end point of each line.


The hidden line algorithm now results in a rather non-constant load on the CPU for the animation phases. Depending on the number of visible cube faces, either 4 lines (1 face visible), 7 lines (2 faces visible) or 9 lines (3 faces visible) are drawn. This calls for a frame rate limiter - otherwise the speed of the animation would appear uneven.

In the interrupt service routine, IRQ_00 now counts up the number of screen refreshes instead of 'just' being set as flag:

Code: Select all

.IRQ
 INC IRQ_00
 JMP &EABF
.IRQ_00
 EQUB &00
... and these 8 instructions in the main program perform the frame rate limiter:

Code: Select all

 LDX IRQ_00
 CPX zp_limit
 BCS Main_03
 LDX zp_limit
.Main_03
 CPX IRQ_00
 BCS Main_03
 LDX #&00
 STX IRQ_00
zp_limit is 2 for PAL, and 3 for NTSC, which ensures each animation phase stays on screen at least for 3 screen refreshes on PAL (=> 50/3 Hz ~= 17 Hz) and for 4 screen refreshes on NTSC (=> 60/4 Hz = 15 Hz).


That small detour on the way to the CubeIco24 demo being done, all that is left is properly introducing the fastest general purpose line routine on the VIC-20.

Stay tuned ...


P.S. As has been noted in the OP, please use the accompanying discussion thread for questions and other comments. Thank you.
Post Reply